


Hi folks,
In this blog, you will learn about OWASP ZAP, how does ZAP work and how to run effective security tests with ZAP.
What is OWASP ZAP?
ZAP is an open source & completely FREE security testing tool developed by OWASP. It is used to find the vulnerabilities in web application. It is also known as Zed Attack Proxy or OWASP ZAP.
Because it is simple to use and install, this tool is great for beginners to start web application security testing. Developers and functional testers may automate the security testing of their apps with the help of the ZAP tool. ZAP may be used with other tools, such as Burp Suite, Selenium, to automate testing.
How does ZAP works?
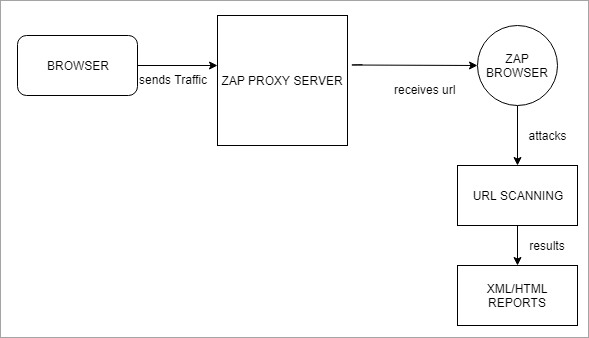
ZAP sets up a proxy server and directs website traffic via it. To detect website vulnerabilities, we use automatic scanners in ZAP. Please check the screenshot for more information.
Setting up your proxy server-
Step-1:
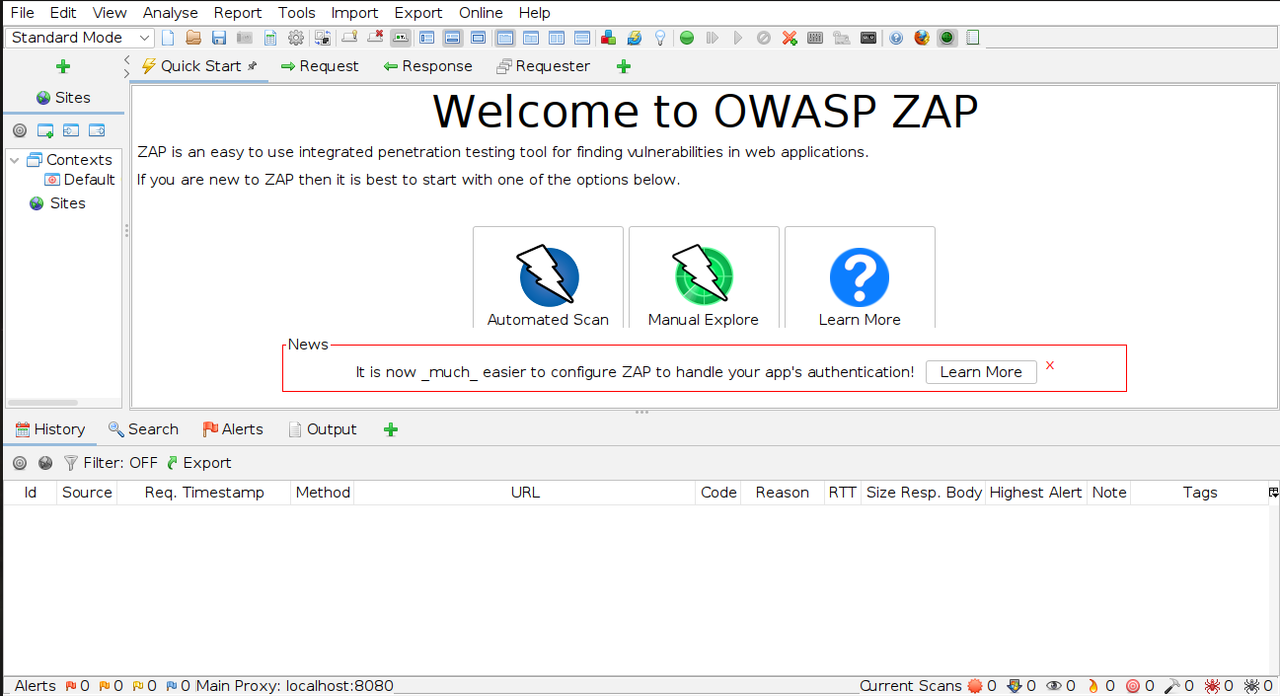
Launch ZAP after installation. Please refer the below image.
Step-2:
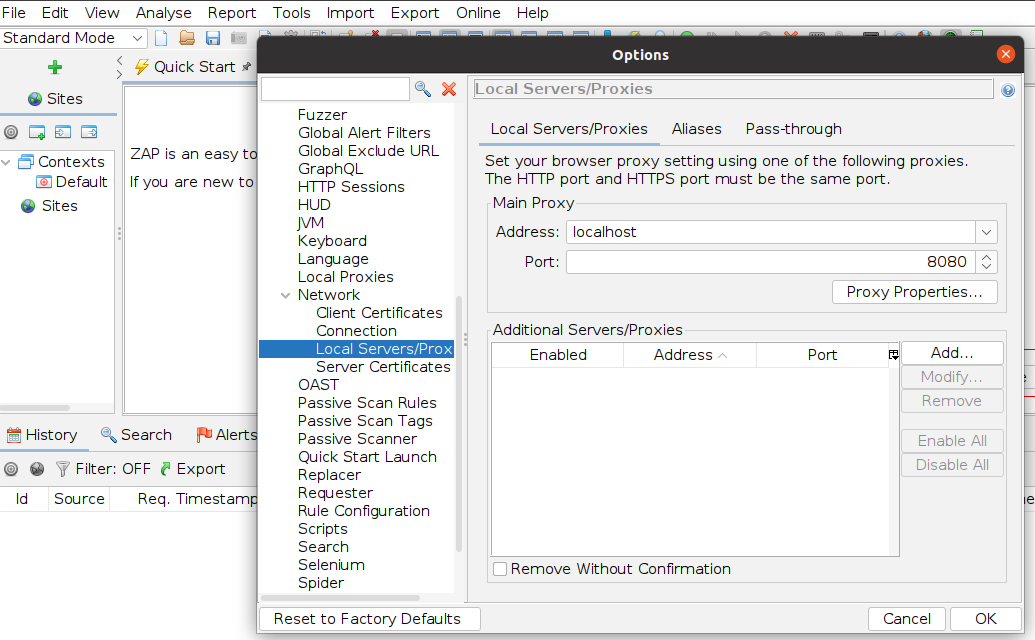
Setup a proxy server on ZAP tool as well as Mozilla Firefox (you can see any other browser i.e. Chrome, Internet Explorer etc). To setup proxy server on ZAP, go to Tools menu >> select Options >> select Network >> select Local Servers/Proxies >> there we can see the address as localhost (127.0.0.1) and port as 8080, we can change to other ports i.e. 8099. Please check the screenshot below:
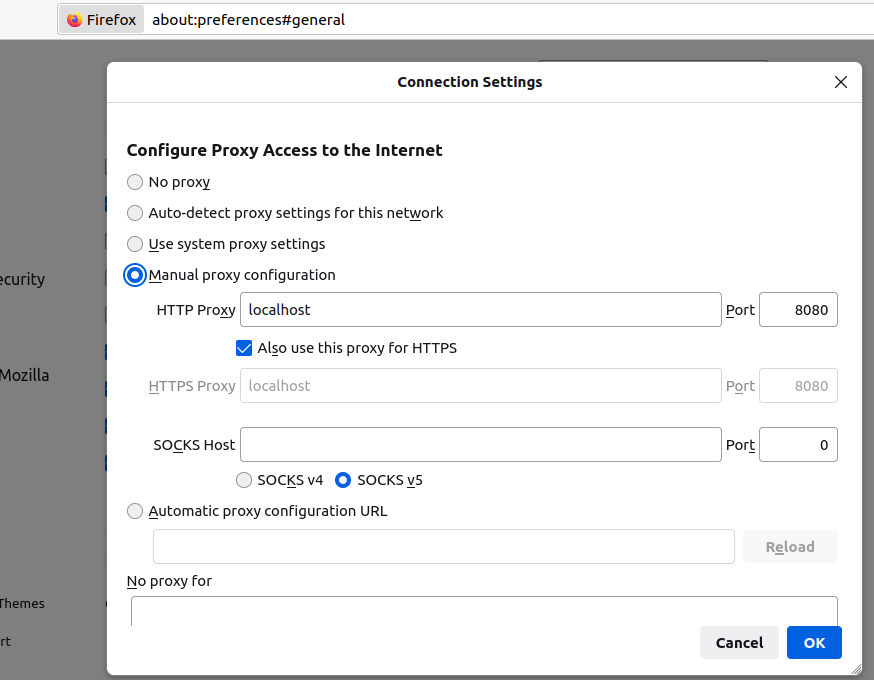
Now, Open Mozilla Firefox >> select Settings >> select General >> select Network Settings >> select option Manual proxy configuration. Use the same port as in the Zap tool. Please check the screenshot below:
Test execution in proxy server-
Step-1:
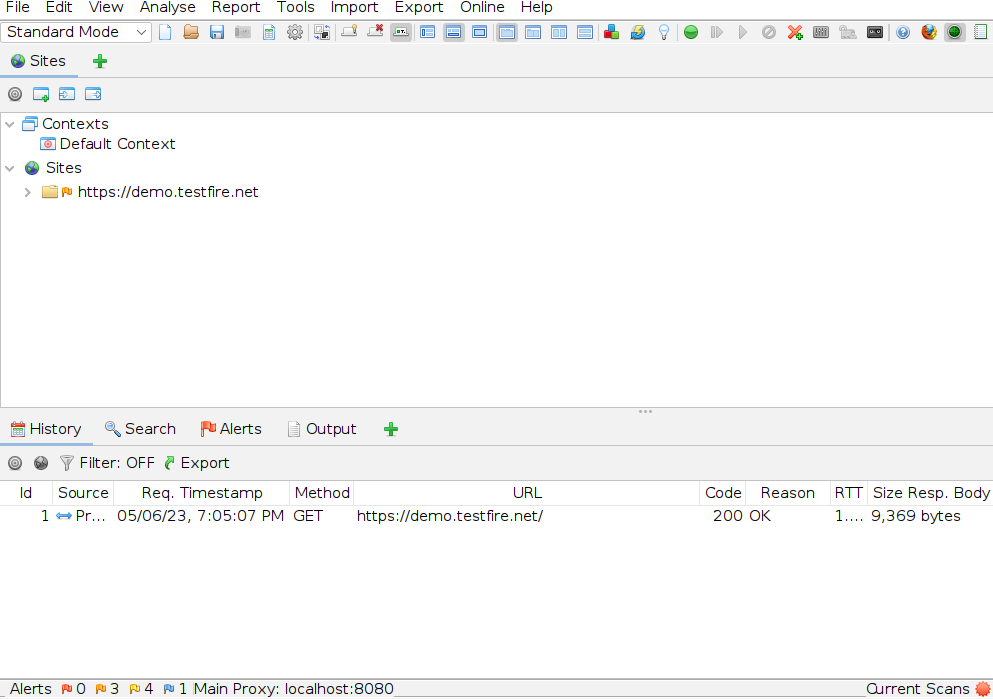
Now, access the URL in the proxy browser. Here, I am using the URL as https://demo.testfire.net. Click on Advanced >> accept risk and continue. After accepting, the landing page gets display. At the same time, ZAP launches a new session and loads the website under Sites. Refer the screenshot below.
Step-2:
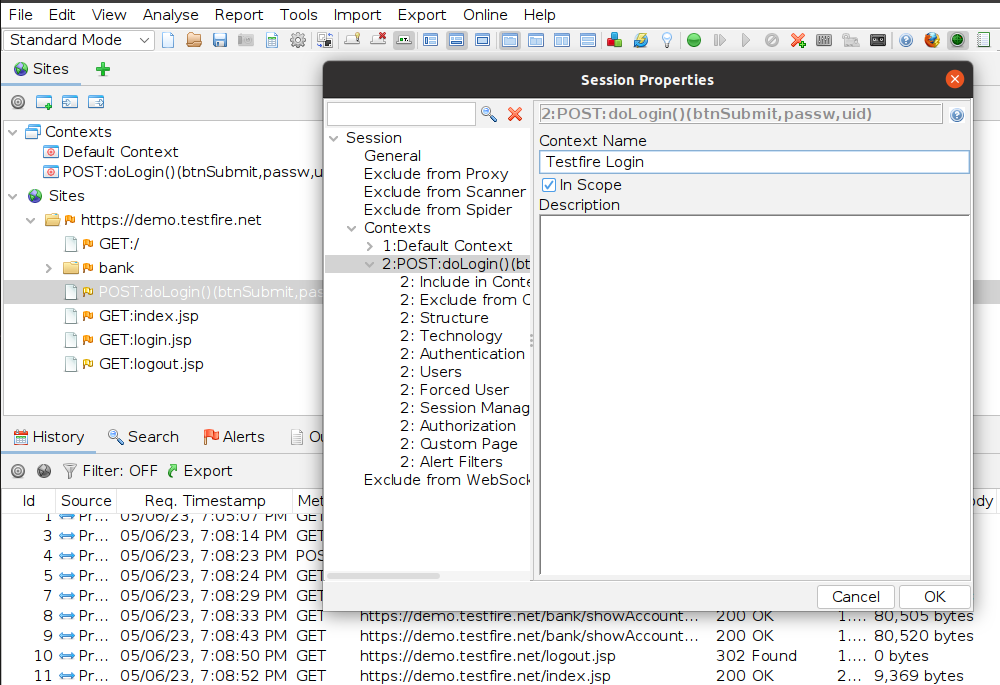
Include the login URL in a context. This may be accomplished by either adding it as a new context or by including it in the default context. Refer the below image.
Step-3:
Now, next is Authentication method. Here, I am using Form-based Authentication method. For this, select the target URL, add post data for Login Request after that, change the parameter as username and passw -> Click OK.
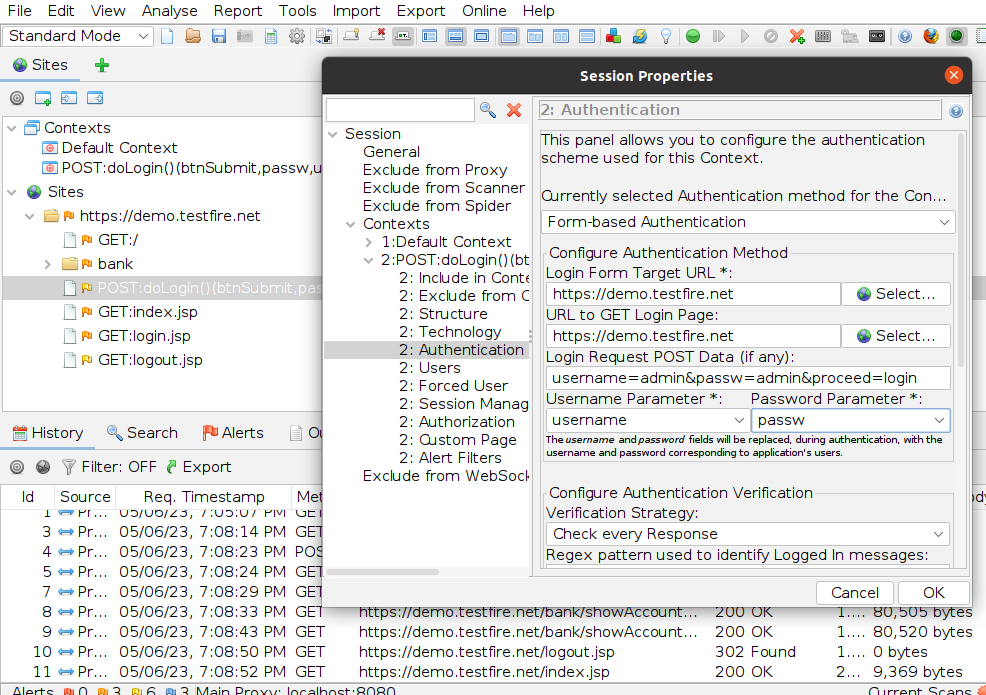
Also, set the indicators that will tell ZAP when it is authenticated.
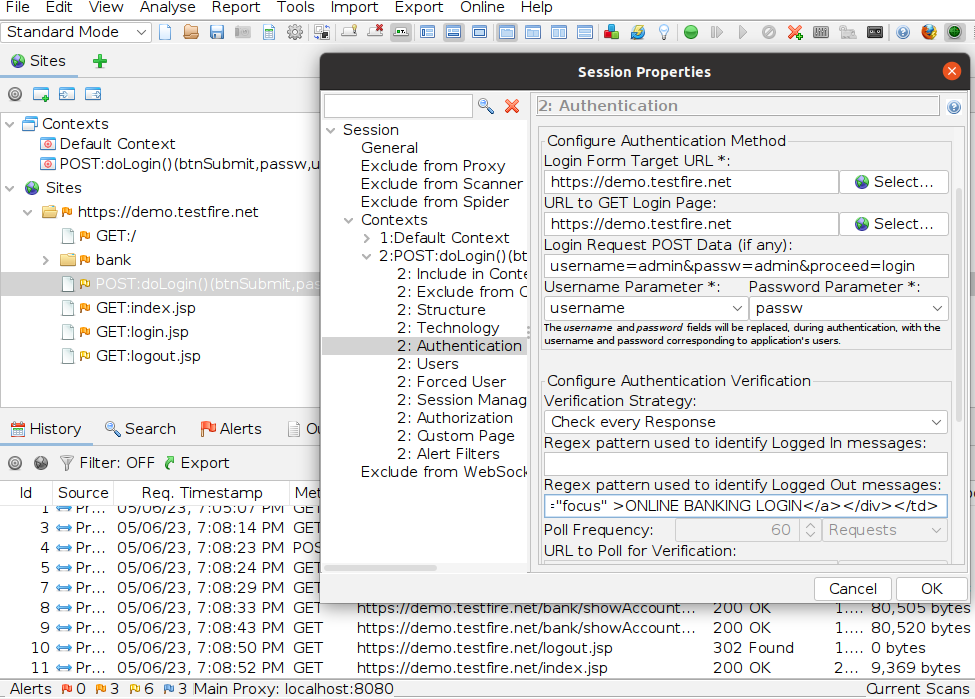
Logged in and Logged out indicators:
1. Only one is necessary.
2. Regex patterns can be configured to match in the return message, and an indicator of whether a user is logged in or out must be set.
3. Identify when a response is authenticated or when not.
Refer the below image for indicators.
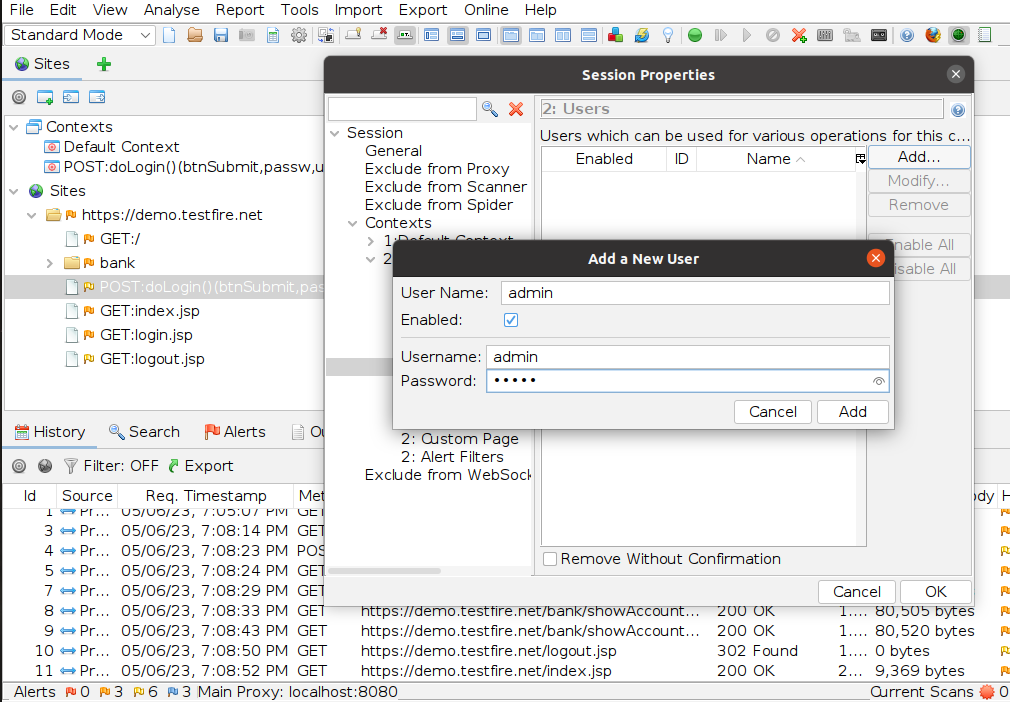
Step-4:
Now, we need to add users i.e. valid and invalid user then apply attack & analyze the results.
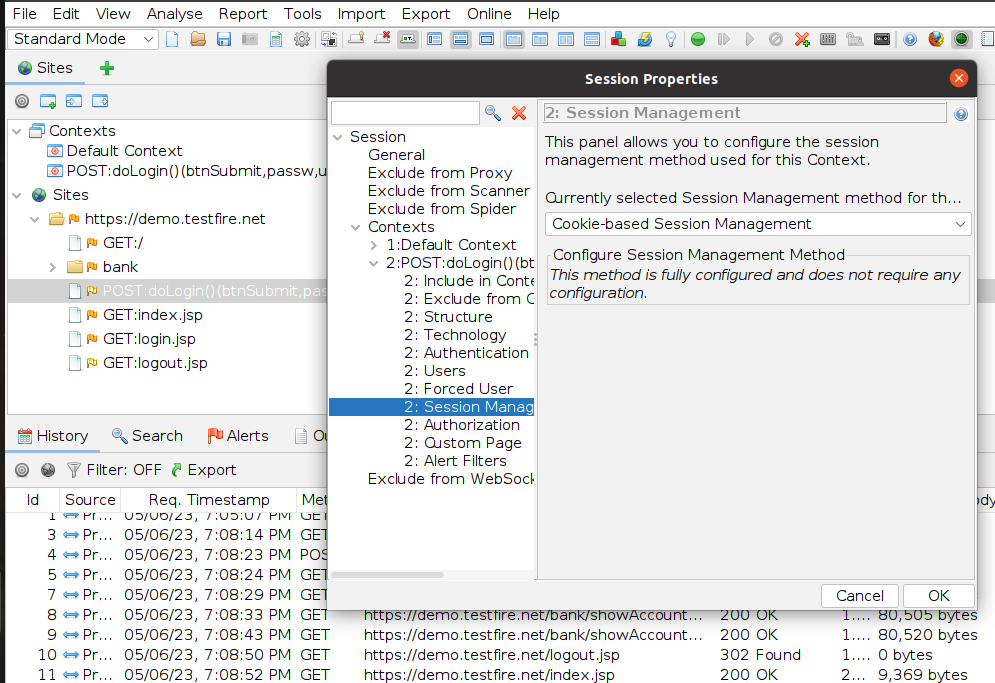
Step-5:
By default set the session management as Cookie-based method then Click OK.
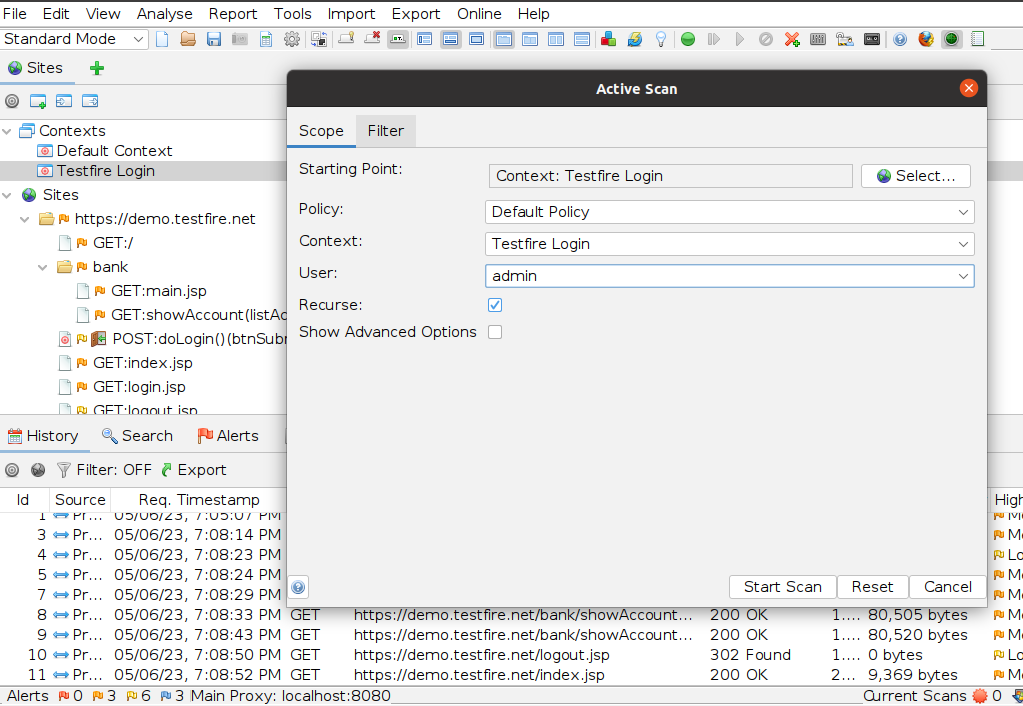
Step-6:
Now, Initiate the Active Scan and analyse the results/reports.
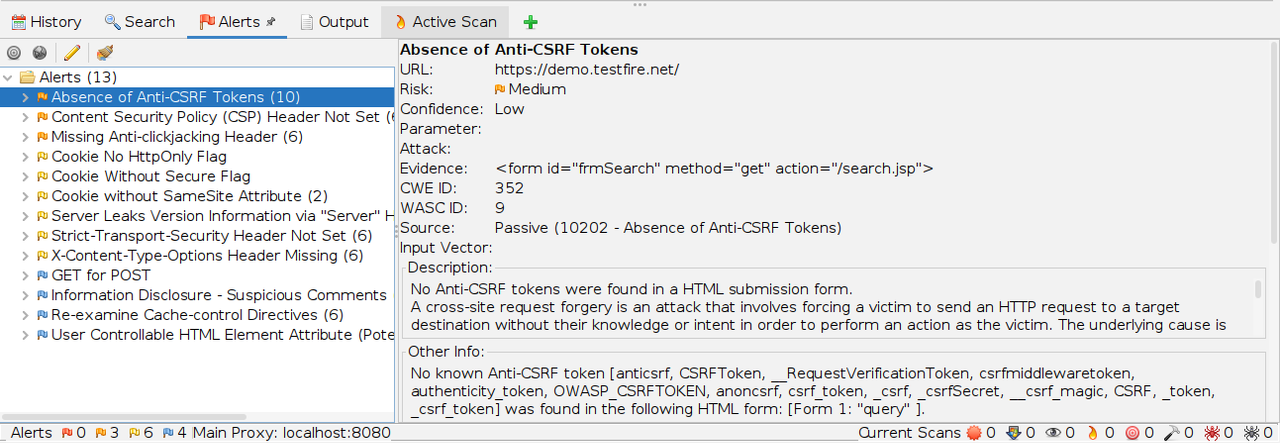
When a scan is successful then ZAP displays a list of application security problems. Under the “Alerts” menu, you can locate all problems and description about the problem. Please refer the below image.
Conclusion
The OWASP ZAP tool is a valuable resource for web application development and testing. Certain problems might be so well-hidden within an application that utilising a tool like OWASP ZAP is the only way to find them. With the help of this tool, the tester may manually browse pages and tamper with requests in addition to doing automatic scans.