


Hello readers, today we will learn about how to integrate a selenium grid with continuous integration for this blog we are going to take Jenkins in our scope.
What is Continuous Integration
Continuous Integration (CI) is a software development practice that involves automatically and regularly integrating code changes from multiple developers into a shared repository.
The main goal of CI is to detect and address integration issues early in the development process, leading to a more streamlined and efficient software development workflow.
Here’s how CI typically works:
Version Control: Developers work on their code in isolated branches within a version control system like Git. Each branch represents a specific feature or bug fix.
This process compiles the code, runs unit tests, and creates executable artifacts (e.g., binaries, libraries).
These tests ensure that the code functions correctly and doesn’t introduce regressions.
Continuous Integration Server: The CI server (e.g., Jenkins, Travis CI, CircleCI) is responsible for orchestrating the entire CI process. It monitors the version control system for changes and triggers builds and tests accordingly.
Reporting: After each build and test run, the CI server generates reports that indicate whether the build was successful and if any tests failed. These reports provide valuable feedback to developers about the state of the codebase.
Feedback Loop: If a build or test fails, developers are immediately notified, and they can quickly identify and fix the issues. This short feedback loop encourages rapid iteration and prevents the accumulation of defects in the codebase.
Why Jenkins Integration
- Test automation helps us with continuous defects, errors, and bugs as early as possible. If we find the issue earlier then it is cheaper to fix it.
- With CI/CD integration we can run our tests after every build or after a certain duration of time which will help us identify any issues.
- It is always faster to test the service manually or to run the regression manually. As it will run automatically without any manual intervention.
- So, that we can see if any tests are failing or not. If they are failing they can be easily fixed.
Setup Jenkins
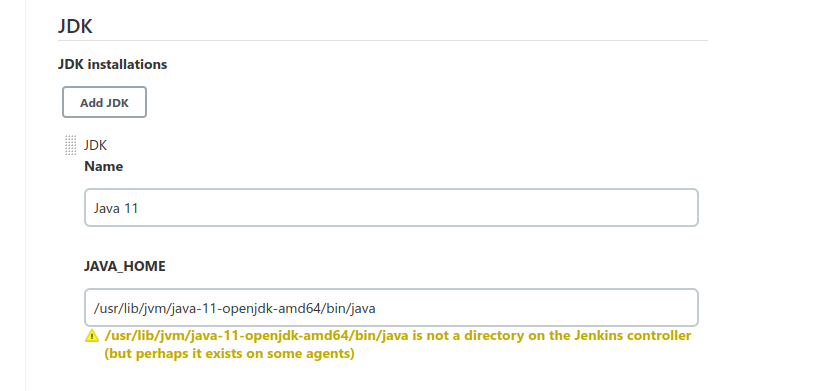
We are using a maven project and pom.xml class to execute our test. To complete that, we will be required to configure JDK and Maven in Jenkins.
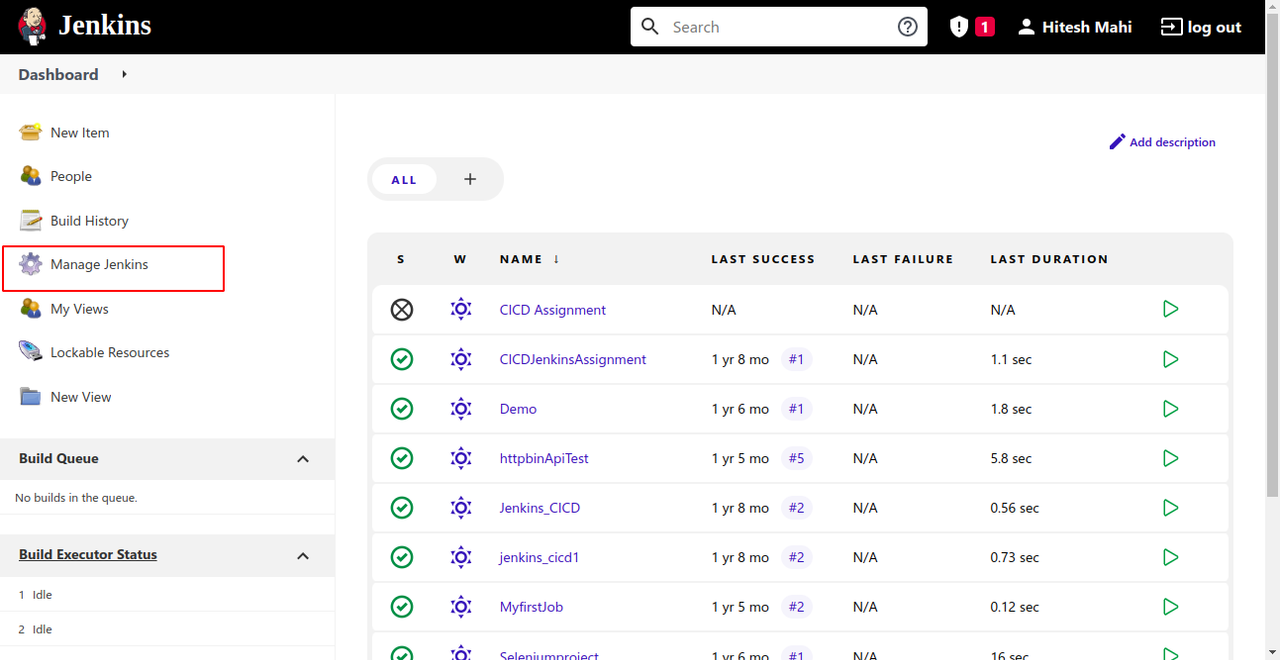
Log in to Jenkins and redirect to Manage Jenkins.
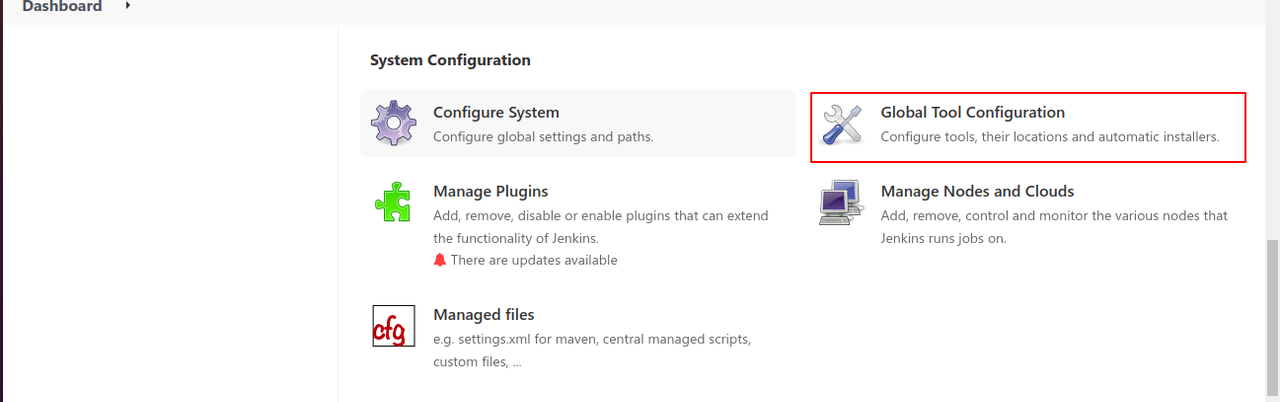
2)Go to Global Tool Configuration.
Here you have 2 options either install it automatically by selecting a checkbox (Install automatically), selecting the version and entering your oracle account details.
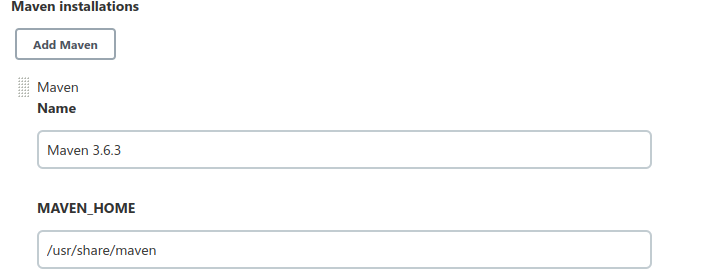
Maven Setup
Redirect to Maven and click on Maven installations.
Here you have 2 options either install it automatically by selecting a checkbox (Install automatically) Or select the Maven version that you want in your project.
Now save all the changes and redirect to the Jenkins dashboard and click on Manage plugins and search selenium plugin for running the selenium grid on Jenkins.
Setting up selenium grid on Jenkins
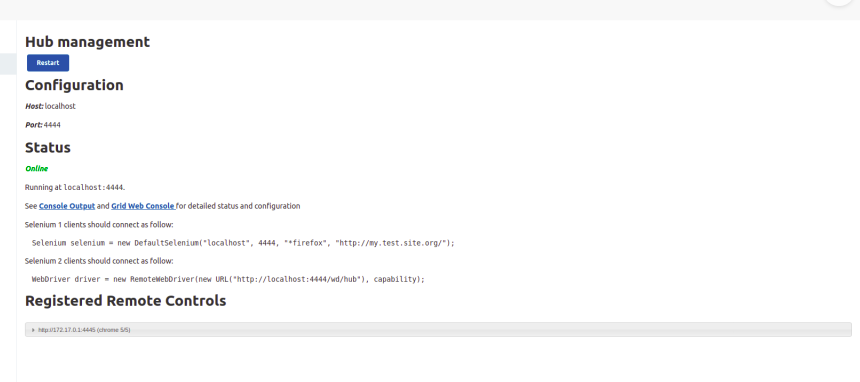
After installing the Selenium plugin we are able to view the Hub section page where the URL to the Hub is given. This will be used to execute our tests on Jenkins.
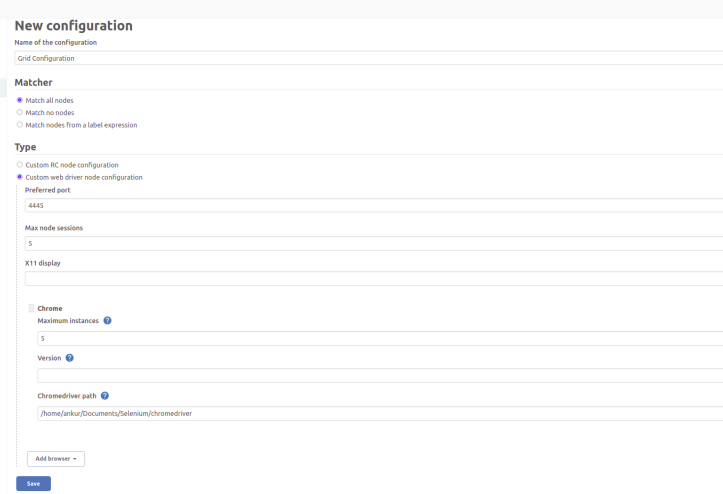
Go to the Configurations tab and then have to click on New Configurations.
Sample Code for Grid
import org.openqa.selenium.WebDriver;
import org.openqa.selenium.remote.DesiredCapabilities;
import org.openqa.selenium.remote.RemoteWebDriver;
import org.testng.annotations.AfterMethod;
import org.testng.annotations.BeforeMethod;
import org.testng.annotations.Test;
import java.net.MalformedURLException;
import java.net.URL;

public class GridTest {
    private WebDriver driver;

    @BeforeMethod
    public void setup() throws MalformedURLException {
        // Set the hub URL
        URL hubUrl = new URL("http://your-grid-hub-ip:4444/wd/hub");

        // Set desired capabilities
        DesiredCapabilities capabilities = DesiredCapabilities.chrome();

        // Create the remote WebDriver instance
        driver = new RemoteWebDriver(hubUrl, capabilities);
    }

    @Test
    public void testGoogleSearch() {
        driver.get("https://www.google.com");

    }

    @AfterMethod
    public void tearDown() {
        driver.quit();
    }
}
Conclusion
Today we have learned about how to Integrate the Selenium grid into CI