


In this article, we will build a serverless application with AWS services that takes a blog title via an API call, uses a Large Language Model (LLM) from Amazon Bedrock to generate the blog content, and saves the final article to an S3 bucket.
Amazon Bedrock is a fully managed service that provides a unified API for accessing a wide range of foundation models from Amazon and leading AI companies like Anthropic, AI21 Labs, and Cohere. Instead of having to set up servers and manage different APIs, you can simply call a single Bedrock API to generate content with Artificial Intelligence (AI). This offers flexibility and a low barrier to entry. For more information, please refer to https://aws.amazon.com/bedrock/
Here is a complete, step-by-step demo guide on how to use API Gateway, Lambda, S3, and Amazon Bedrock to generate a blog post from a title, tested via Postman.
Workflow
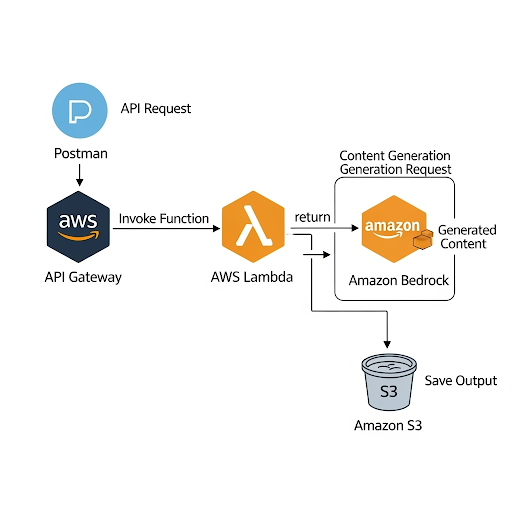
- Postman: Sends a
POSTrequest with a JSON body{"title": "Title of a blog"}to our API Gateway endpoint. - API Gateway: Receives the request and triggers our AWS Lambda function, passing the title along.
- AWS Lambda (Python):
- Parses the title from the incoming event.
- Constructs a prompt for the foundation model.
- Invokes Amazon Bedrock to generate the blog content.
- Saves the generated content as a
.txtfile in an S3 bucket. - Returns a success message with the S3 location of the file.
- Amazon Bedrock: Provides the LLM (we’ll use Anthropic Claude 3 Haiku) to generate the text.
- Amazon S3: Stores the final blog post file.
Prerequisites
- AWS Account: With access to Lambda, API Gateway, S3, and IAM.
- Postman: Installed to test the API endpoint.
- Enable Model Access in Bedrock:
- Go to the Amazon Bedrock console.
- In the bottom-left menu, click on Model access.
- In the [Base models], ensure you have requested and been granted access to Anthropic Claude 3 Haiku (AWS Bedrock’s model_id is [anthropic.claude-3-haiku-20240307-v1:0])

Main Steps
Step 1: Create the S3 Bucket
This bucket will store the generated blog posts.
- Navigate to the S3 console in AWS.
- Click Create bucket.
- Bucket name: Choose a globally unique name (e.g., my-genai-blog-posts ). Remember this name.
- Region: Select your preferred region (e.g., ap-southeast-1).
- Leave the rest of the settings as default and click Create bucket.


Step 2: Create the IAM Role for Lambda
Our Lambda function needs permission to interact with Bedrock, S3, and CloudWatch (for logging).
- Navigate to the IAM console.
- Go to Roles and click Create role.
- Trusted entity type: Select AWS service.
- Use case: Select Lambda, then click Next.
- On the “Add permissions” page, search for and add the
AWSLambdaBasicExecutionRolepolicy. This allows logging. - Click Next.
- Role name: Give it a descriptive name, like
GenAIBlogLambdaRole. - Click Create role.
- Add Custom Permissions: JSON
- Find the role you just created (
GenAIBlogLambdaRole) and click on its name.Click Add permissions -> Create inline policy.
- Switch to the JSON tab and paste the following policy to allow to invokeModel called with model_id = [anthropic.claude-3-haiku] from AWS Bedrock and putObject into S3 bucket called [my-genai-blog-posts]
- Find the role you just created (
- Click Next, give the policy a name (e.g.,
BedrockS3Permissions), and click Create policy. - Refer to https://blog.nashtechglobal.com/getting-started-with-aws-iam-policy-part-1/ for more information about IAM policy.
{
    "Version": "2012-10-17",
    "Statement": [
        {
            "Effect": "Allow",
            "Action": "bedrock:InvokeModel",
            "Resource": "arn:aws:bedrock:ap-southeast-1::foundation-model/anthropic.claude-3-haiku-20240307-v1:0"
        },
        {
            "Effect": "Allow",
            "Action": "s3:PutObject",
            "Resource": "arn:aws:s3:::my-genai-blog-posts/*"
        }
    ]
}
Step 3: Create the AWS Lambda Function that integrating with generative AI
This is the core logic of our application.
- Navigate to the Lambda console.
- Click Create function.
- Select Author from scratch.
- Function name:
GenerateBlogFunction. - Runtime: Select Python 3.12.
- Architecture:
x86_64 - Permissions: Expand “Change default execution role”, select Use an existing role, and choose the
GenAIBlogLambdaRoleyou created in Step 2. - Click Create function.
- Add the Code:
- Once the function is created, scroll down to the Code source editor.
- Replace the contents of
lambda_function.pywith the Python code below.
lambda_function.py
Our simple prompt as below:
Human: Generate a well-structured and engaging blog post of about 400 words based on the following title.
The blog post should have an introduction, several main points with headings, and a conclusion.

Title: "{title}"
Python
import json
import boto3
import os
import logging
import re
from datetime import datetime

# Set up logging
logger = logging.getLogger()
logger.setLevel(logging.INFO)

# Initialize AWS clients
bedrock_runtime = boto3.client('bedrock-runtime')
s3_client = boto3.client('s3')

# Get bucket name from environment variables
S3_BUCKET_NAME = os.environ.get('S3_BUCKET_NAME')
BEDROCK_MODEL_ID = "anthropic.claude-3-haiku-20240307-v1:0"

def generate_blog_content(title):
    """Invokes Bedrock to generate blog content from a title."""
    prompt = f"""
Human: Generate a well-structured and engaging blog post of about 400 words based on the following title.
The blog post should have an introduction, several main points with headings, and a conclusion.

Title: "{title}"

Assistant:
"""

    body = json.dumps({
        "anthropic_version": "bedrock-2023-05-31",
        "max_tokens": 2048,
        "messages": [
            {
                "role": "user",
                "content": [{"type": "text", "text": prompt}]
            }
        ]
    })

    logger.info(f"Invoking Bedrock with model ID: {BEDROCK_MODEL_ID}")
    response = bedrock_runtime.invoke_model(
        body=body,
        modelId=BEDROCK_MODEL_ID,
        accept='application/json',
        contentType='application/json'
    )

    response_body = json.loads(response.get('body').read())
    blog_content = response_body.get('content')[0].get('text')

    return blog_content

def lambda_handler(event, context):
    logger.info(f"Received event: {json.dumps(event)}")

    try:
        # 1. Parse the title from the API Gateway event
        body = json.loads(event.get('body', '{}'))
        title = body.get('title')

        if not title:
            return {
                'statusCode': 400,
                'body': json.dumps({'error': 'Title is required in the request body'})
            }

        logger.info(f"Generating blog for title: {title}")

        # 2. Generate blog content using Bedrock
        blog_content = generate_blog_content(title)

        # 3. Save the blog content to S3
        # Create a sanitized, unique filename
        sanitized_title = re.sub(r'[^a-zA-Z0-9-]', '-', title.lower()).strip('-')
        timestamp = datetime.utcnow().strftime('%Y%m%d%H%M%S')
        file_name = f"{sanitized_title}-{timestamp}.txt"

        s3_client.put_object(
            Bucket=S3_BUCKET_NAME,
            Key=file_name,
            Body=blog_content,
            ContentType='text/plain'
        )

        s3_uri = f"s3://{S3_BUCKET_NAME}/{file_name}"
        logger.info(f"Successfully saved blog to {s3_uri}")

        # 4. Return a successful response
        return {
            'statusCode': 200,
            'body': json.dumps({
                'message': 'Blog post generated successfully!',
                's3_uri': s3_uri
            })
        }

    except Exception as e:
        logger.error(f"Error processing request: {e}")
        return {
            'statusCode': 500,
            'body': json.dumps({'error': 'An internal error occurred.'})
        }

Configure Environment Variables:
- Go to the Configuration tab, then Environment variables.
- Click Edit, then Add environment variable.
- Key:
S3_BUCKET_NAME - Value: my-genai-blog-posts
- Click Save.

Increase Timeout (Important):
- Still in the Configuration tab, go to General configuration.
- Click Edit.
- Set the Timeout to 30 seconds (or more). LLM invocations can sometimes take longer than the default 3 seconds.
- Click Save.

Next, click the Deploy button above the code editor to save your changes.

Step 4: Create the API Gateway
This will be the public URL that Postman calls.
- Navigate to the API Gateway console.
- Click Create API.
- Find the HTTP API card and click Build.
- Integrations: Click Add integration.
- Integration type:
Lambda. - Lambda function: Choose your
GenerateBlogFunction.
- Integration type:
- API name:
GenerateBlogs - Click Next.
- Configure routes:
- Method:
POST - Resource path:
/gen-blog - Integration target: Should already be set to your
GenerateBlogFunction.
- Method:
- Click Next.
- Configure stages: Leave the
$defaultstage as is. Auto-deploy is enabled. - Click Next, then Create.
- After creation, you will see an Invoke URL on the dashboard. Copy this URL. It will look something like https://nab9d3ku5h.execute-api.ap-southeast-1.amazonaws.com


Step 5: Test with Postman
Now let’s trigger the entire workflow.

- Open Postman.
- Create a new request.
- Set the method to POST.
- In the URL field, paste your Invoke URL and append your resource path: https://nab9d3ku5h.execute-api.ap-southeast-1.amazonaws.com/gen-blog
- Go to the Body tab.
- Select raw and choose JSON from the dropdown.
- In the text area, enter your blog title:
{ "title": "As a software engineer, how to survive in the rise of Generative AI" } - Click Send.
Expected Response: You should receive a 200 OK
status and a response body like this:
{
    "message": "Blog post generated successfully!",
    "s3_uri": "s3://my-genai-blog-posts/as-a-software-engineer--how-to-survive-in-the-rise-of-generative-ai-20250907165646.txt"
}
Verification: Go to your S3 bucket (my-genai-blog-posts) in the AWS console. You should see the newly created .txt file. You can download and open it to see the AI-generated blog post!

Sample content of the generated file as below:

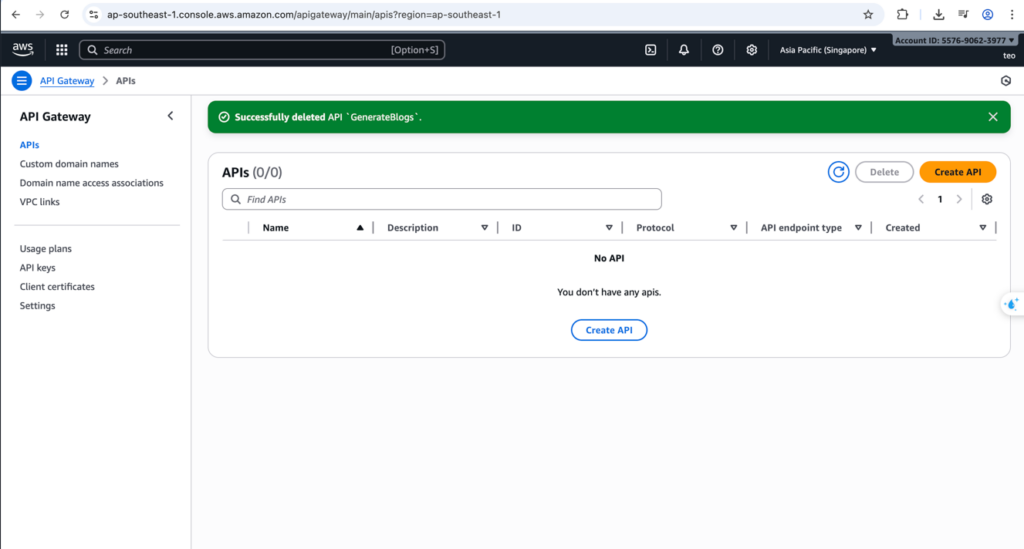
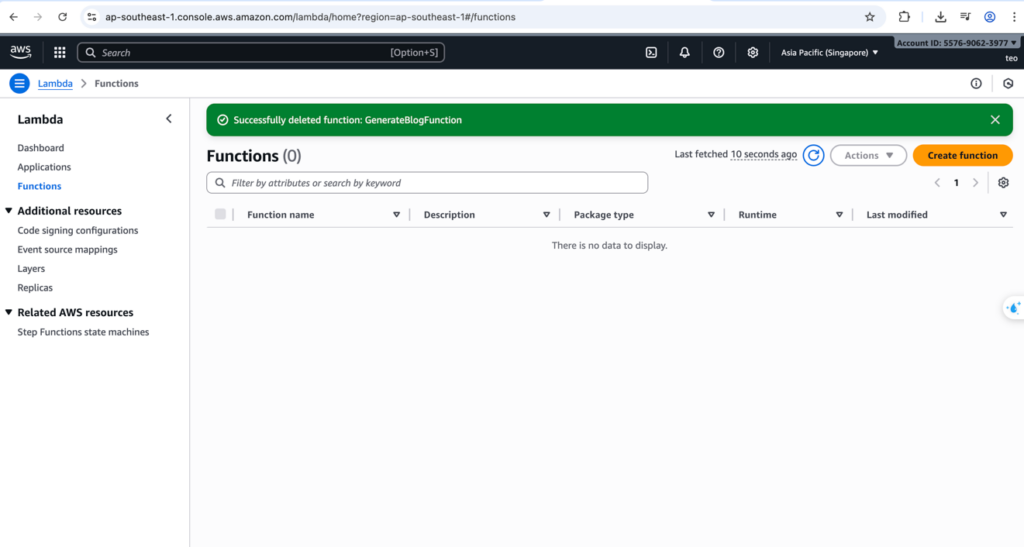
Clean up
Last but not least, we need to do the clean-up step.
- AWS Gateway
- AWS Lambda
- AWS S3 bucket

Conclusion
This hands-on provides a clear and practical example of how to build a fully serverless, end-to-end generative AI application using core AWS services. It demonstrates a seamless workflow, from a user-initiated request to the final generated output, without the need for managing any servers.
Key Learnings
This project showcases the power of several key AWS services working in tandem:
- API Gateway acts as a robust and scalable front door, handling all external requests.
- AWS Lambda provides the event-driven, serverless compute layer, enabling a “pay-for-what-you-use” model.
- Amazon Bedrock serves as the powerful backend for generative AI, abstracting the complexity of managing and invoking large language models.
- Amazon S3 offers a reliable and highly scalable solution.
By integrating these services, you can create a complete application that is not only functional but also highly available, cost-effective, and scalable to meet varying demands.