


Azure Container Registry provides a platform to construct, store, and oversee container images and artifacts within a confidential registry, catering to a variety of container deployments. We can seamlessly integrate Azure container registries into our existing container development and deployment processes.
In this blog, we will create Azure container registry and push a docker image from our local to the registry.
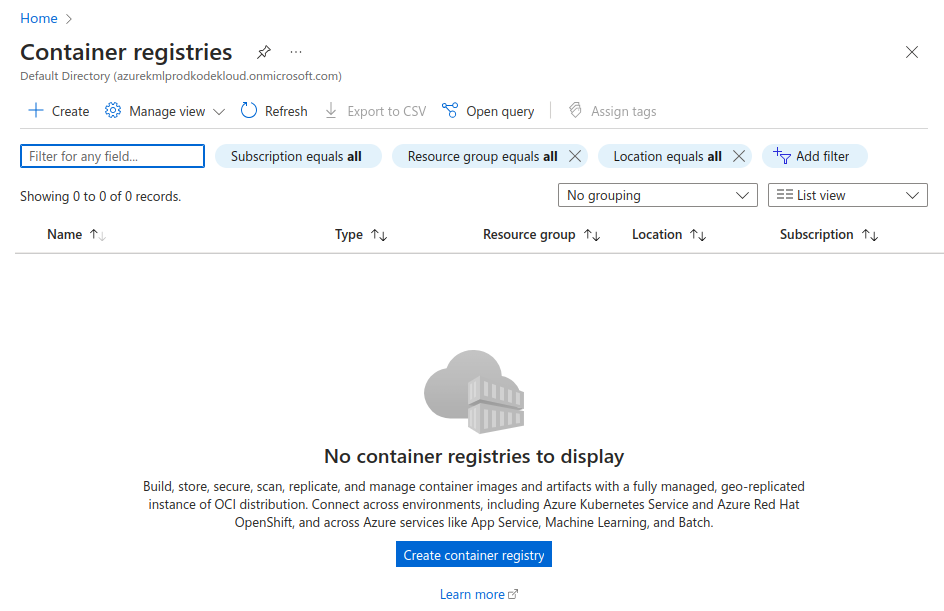
Create Azure Container Registry
Go to Azure portal and search for Container registries.
Click on +Create. Add the project details such as subscription, resource group, registry name and location. Choose the pricing plan accordingly.

Click on Networking to choose the networking related configurations.
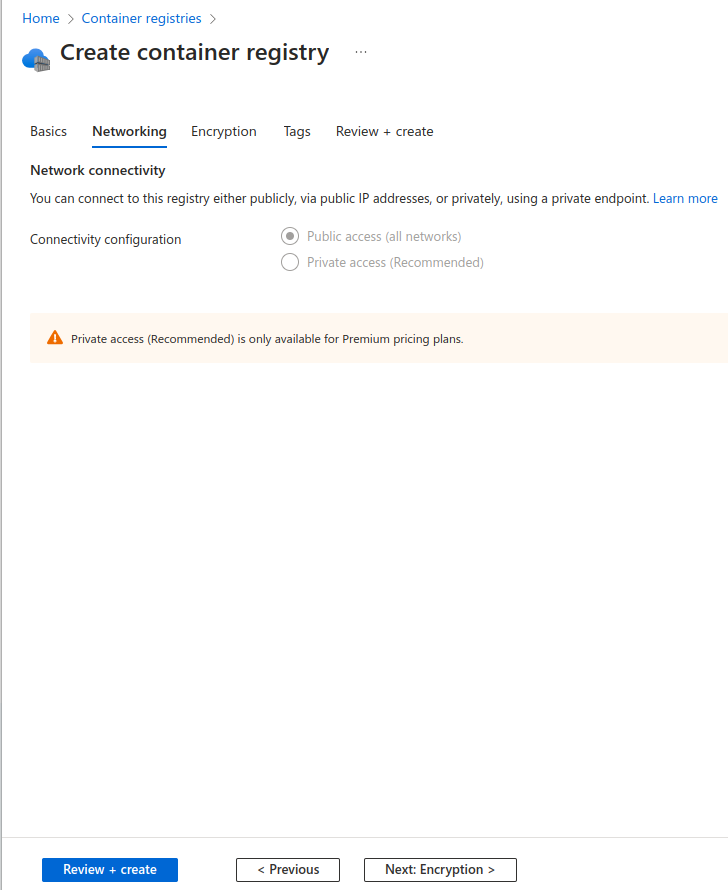
You can add the network connectivity to restrict or allow public access. Click on Review + Create.
Login to Azure Container Registry
Using Azure CLI
To login to the Azure container registry, you can either use Azure CLI command or Powershell.
az login
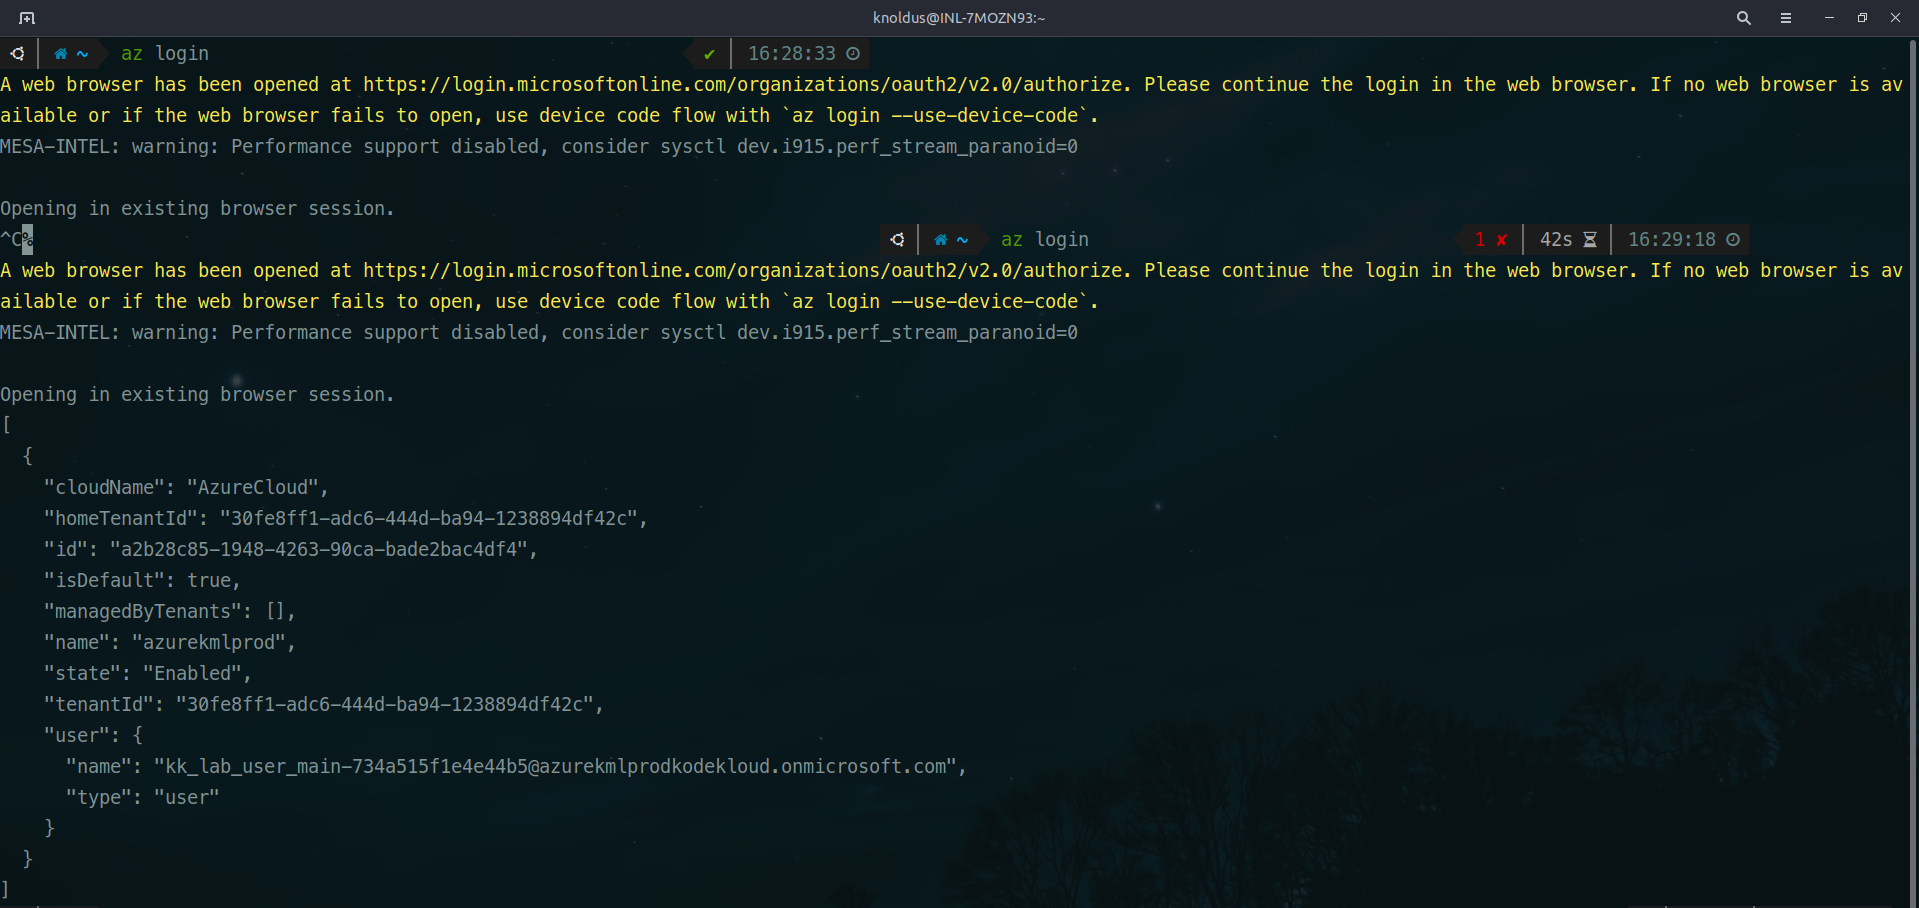
This will open a new tab in your web browser and ask you for authentication.
You can login to the Azure container registry once you have logged in to your azure cloud.
az acr login --name <container-registry-name>

Using Service Account
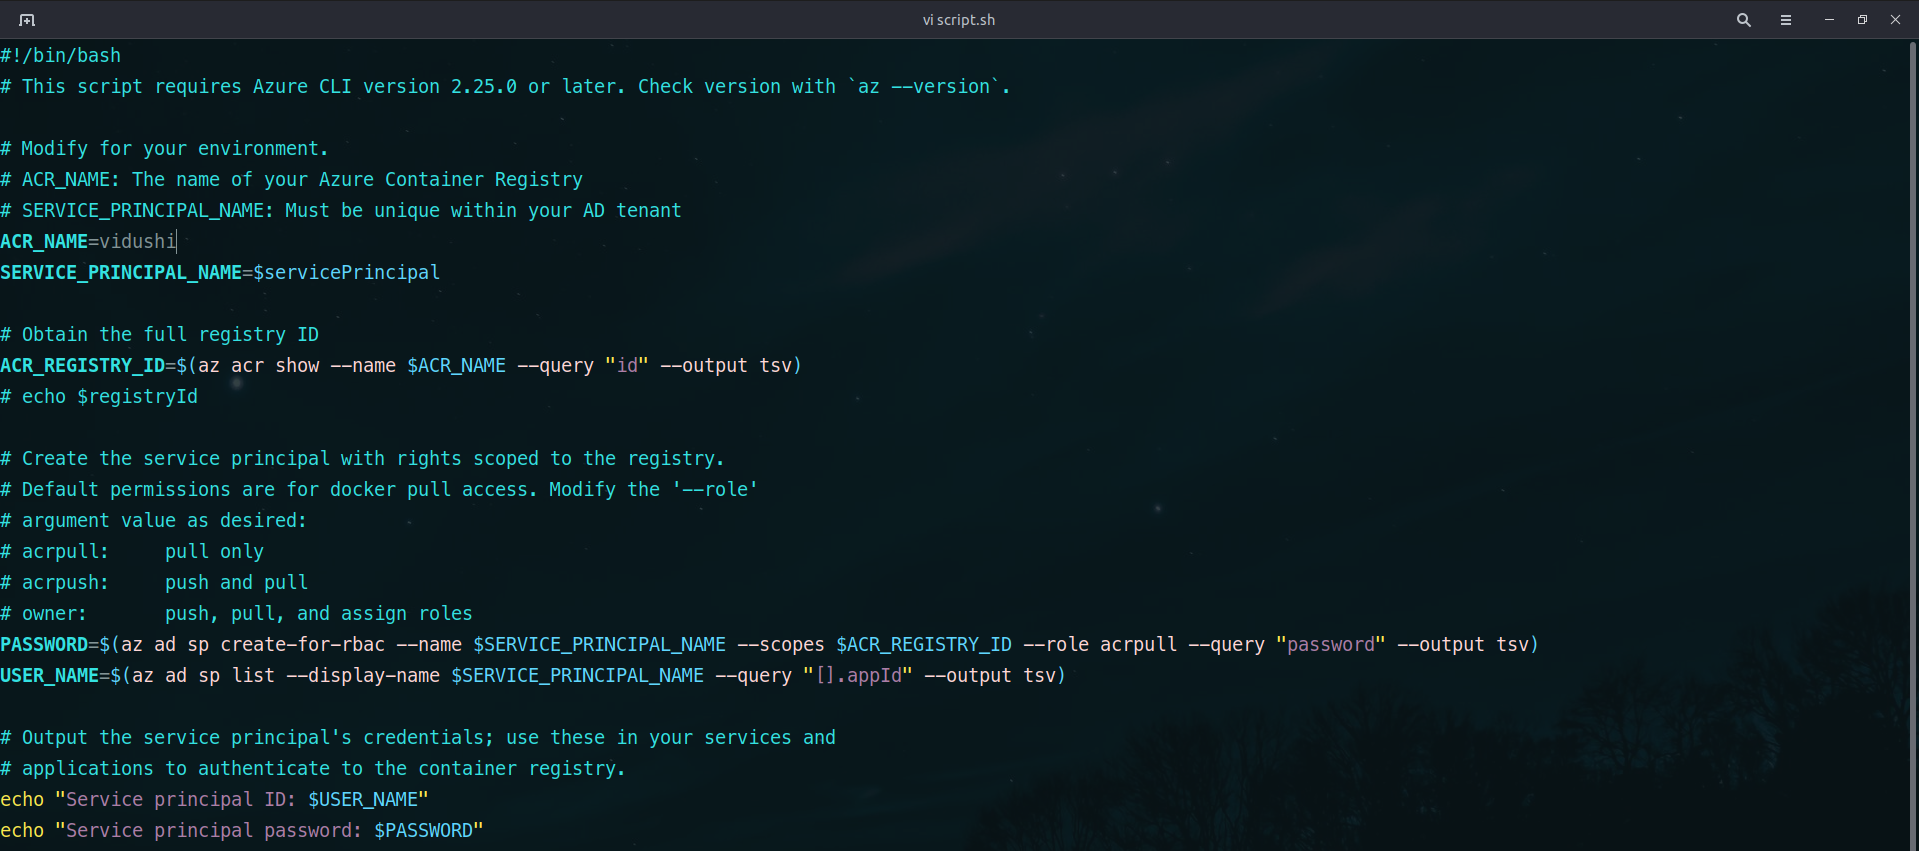
Another option would be to make use of service account to login to ACR. You can run the following script:
#!/bin/bash
# This script requires Azure CLI version 2.25.0 or later. Check version with `az --version`.

# Modify for your environment.
# ACR_NAME: The name of your Azure Container Registry
# SERVICE_PRINCIPAL_NAME: Must be unique within your AD tenant
ACR_NAME=$containerRegistry
SERVICE_PRINCIPAL_NAME=$servicePrincipal

# Obtain the full registry ID
ACR_REGISTRY_ID=$(az acr show --name $ACR_NAME --query "id" --output tsv)
# echo $registryId

# Create the service principal with rights scoped to the registry.
# Default permissions are for docker pull access. Modify the '--role'
# argument value as desired:
# acrpull: pull only
# acrpush: push and pull
# owner: push, pull, and assign roles
PASSWORD=$(az ad sp create-for-rbac --name $SERVICE_PRINCIPAL_NAME --scopes $ACR_REGISTRY_ID --role acrpull --query "password" --output tsv)
USER_NAME=$(az ad sp list --display-name $SERVICE_PRINCIPAL_NAME --query "[].appId" --output tsv)

# Output the service principal's credentials; use these in your services and
# applications to authenticate to the container registry.
echo "Service principal ID: $USER_NAME"
echo "Service principal password: $PASSWORD"
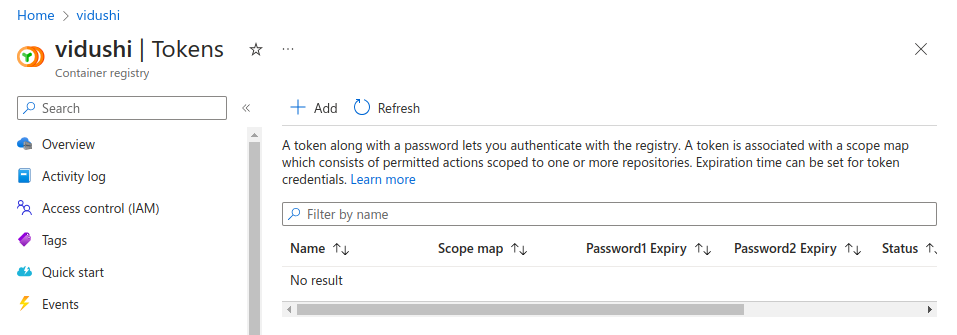
Using Tokens
The third way of logging in to the Azure container registry is via Tokens.
Click on Tokens in the left panel.
Click on +Add.
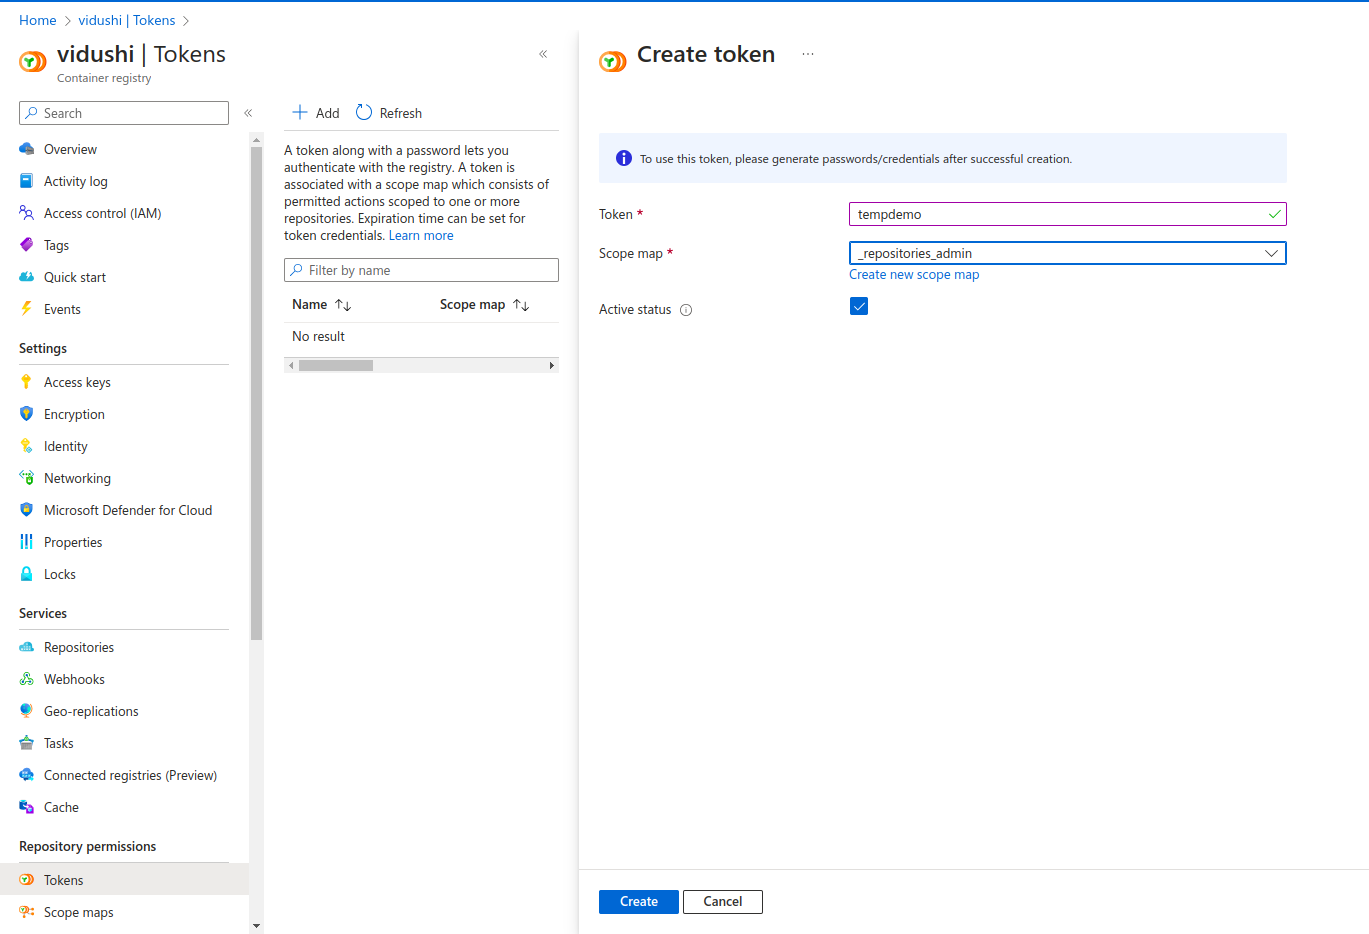
Add the name of the token and Scope, and click on create.

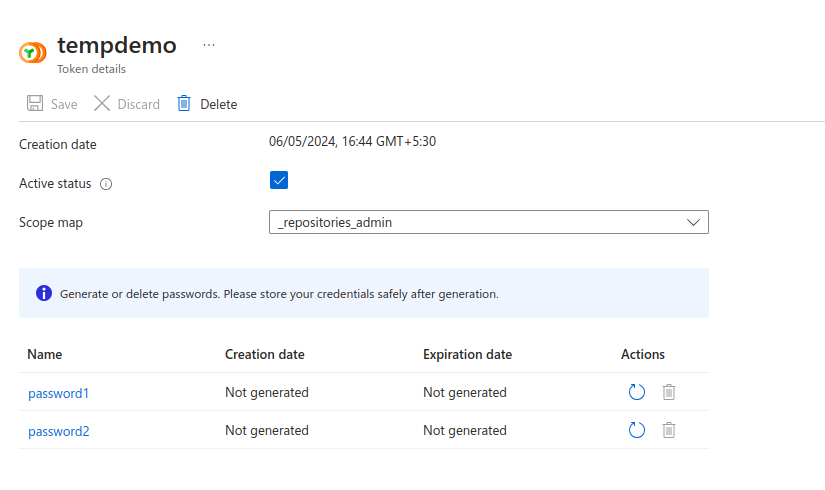
The new token has been created. It currently has no password generated. Click on the token name – tempdemo.
Click on the arrow on the Actions tab for any of the passwords.
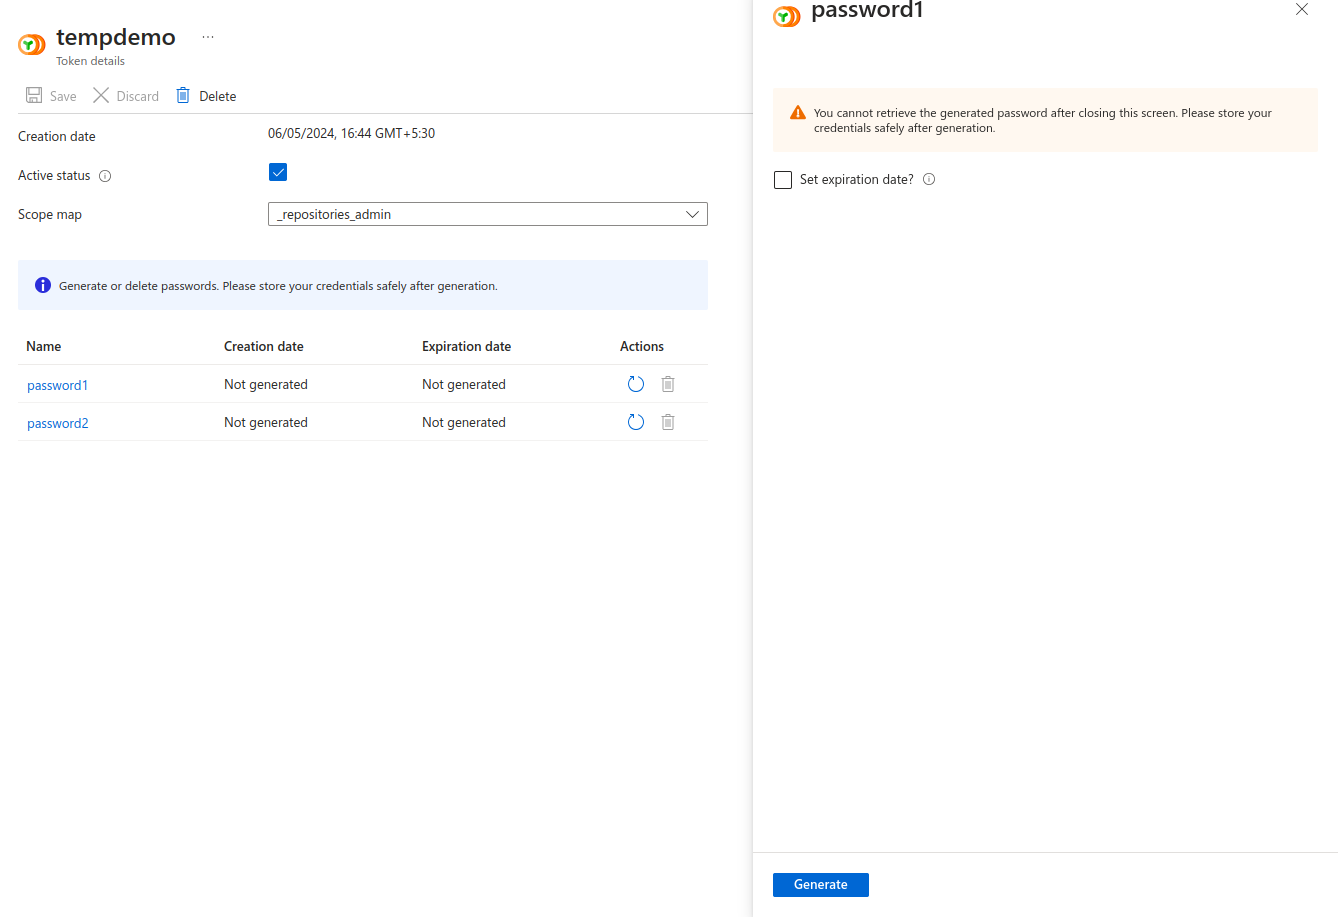
You can set the expiration date if needed. I will leave it blank for now. Click on Generate.
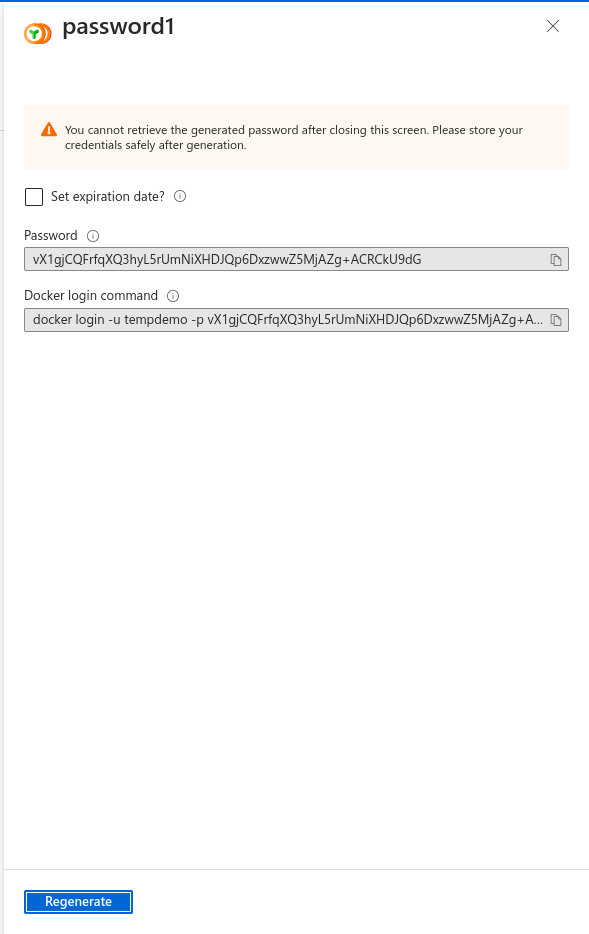
A new password is generated and a docker login command is provided along with it. Use the same login command to login to your Azure container repository.

The login has succeeded.
Push and image to the Azure container Registry
Now that we have logged in to the Azure container registry, we can push the images to the Azure container service.
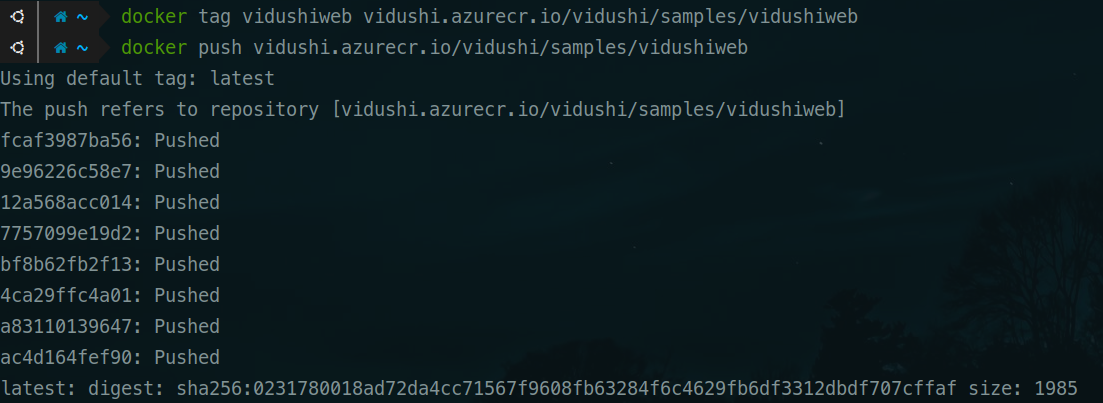
Tag the image accordingly.
docker tag <local-image-name> <acr-server/acr-name/path>
docker push <acr-server/acr-name/path>
Viewing the image in the Azure Portal
Go to the container registry and click on Repositories.
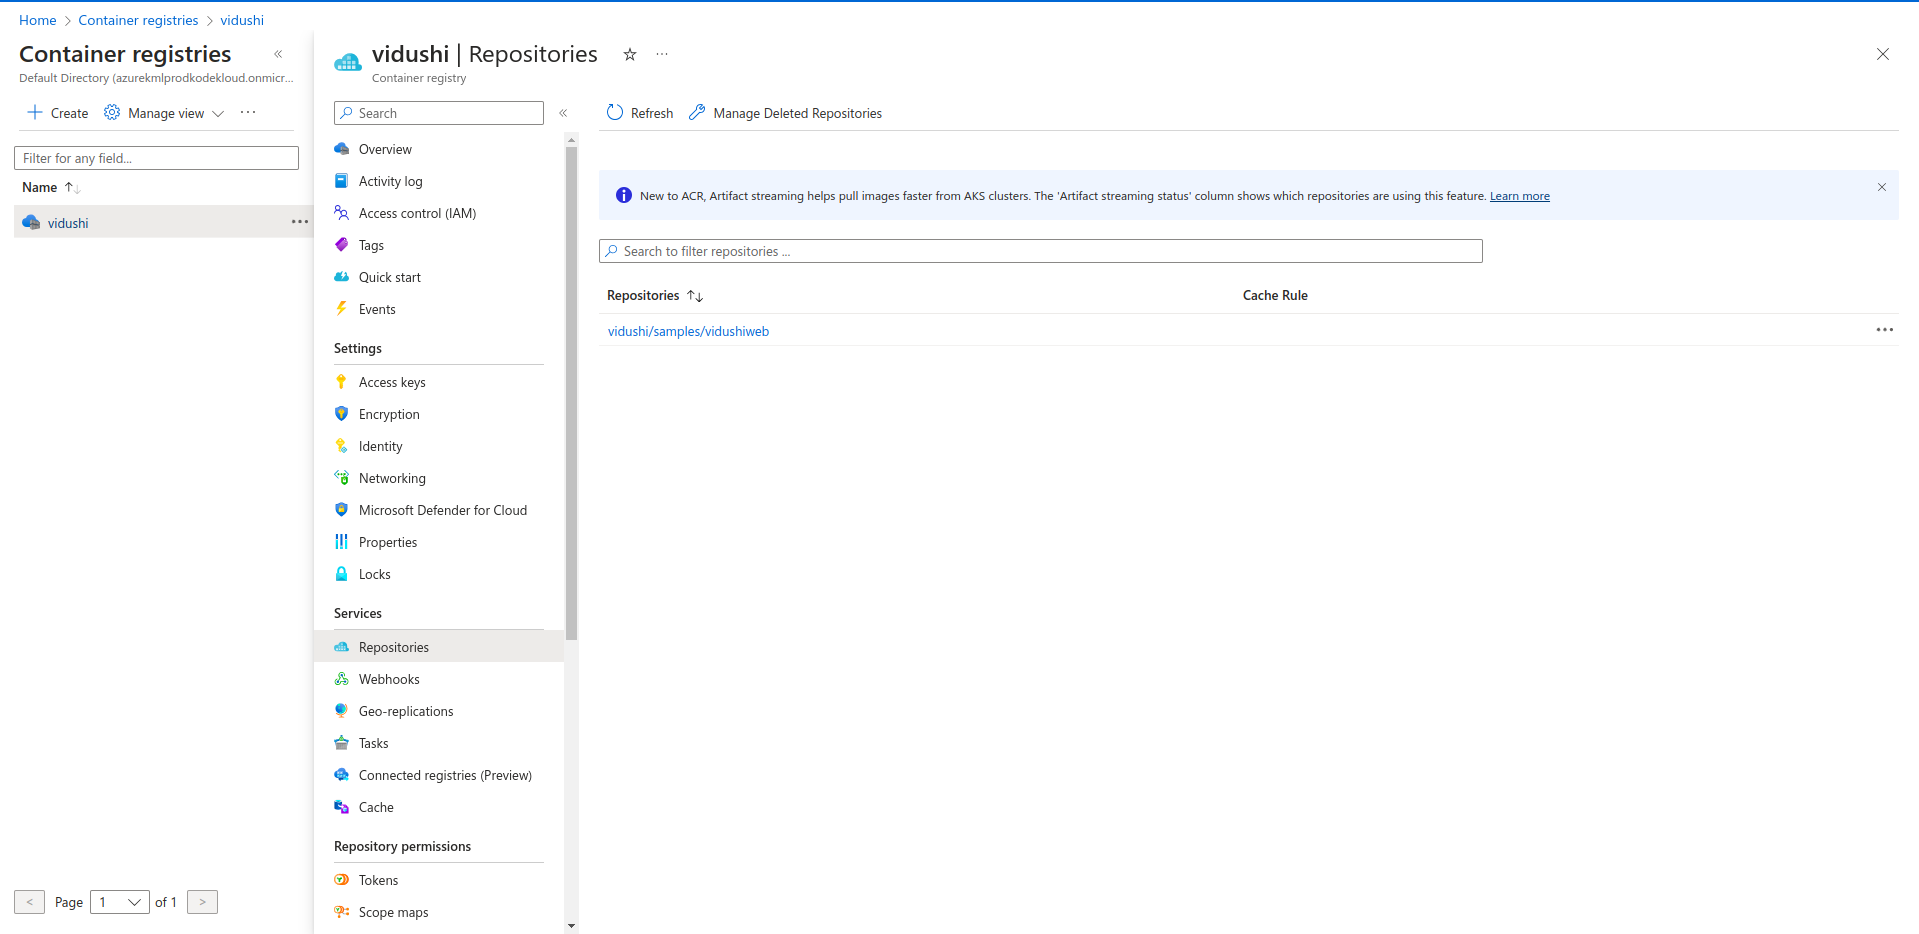
Click on the image to view details.

You can refresh for any new changes to reflect in the portal.
This is how we can create Container registries and push docker images in Azure. If you have any questions/feedbacks regarding this blog, I am reachable at vidushi.bansal@nashtechglobal.com. You can find more of my blogs here.