


Hey Folks,
In today’s software development fast moving landscape, it is crucial to have a robust and efficient testing strategy. K6 is a popular open-source load testing tool, allows you to create and execute performance tests with ease. Docker, on the other hand, provides a lightweight containerization platform that simplifies application deployment and management. Additionally, GitLab is a web-based DevOps platform, enables seamless CI with your source code repository. In this blog post, we will explore how to use Docker to run K6 tests and integrate it with GitLab for continuous testing.
Prerequisites:
Before we dive into the implementation details, make sure you have the following prerequisites in place. Please refer to the official documentations provided below for installation steps:
- Docker : https://docs.docker.com/get-docker/
- K6 : https://k6.io/docs/get-started/installation/
- GitLab : Have a GitLab account or access to an existing GitLab instance. If you don’t have one, you can sign up for a free account at https://gitlab.com/users/sign_in
Step 1: Create a K6 Performance Test Script
Before we containerize our K6 test, let’s start by creating a basic performance test script. Simply open any text editor and create a new file with .js extension add the below code, in this case i have created a file named test.js
import { check } from 'k6';
import http from 'k6/http';

export const options = {
    vus: 50,
    duration: '10s',
  };

export default function () {
  const res = http.get('http://test.k6.io/');
  check(res, {
    'is status 200': (r) => r.status === 200,
  });
}
This example sends a GET request to http://test.k6.io/ with the load of 50 VUs in 10 seconds and verifies that the response status code is 200. You can customize this script to match your specific performance testing requirements.
Step 2: Create a Dockerfile
To containerize our K6 test, we need to create a Dockerfile. Create a Dockerfile in the same directory as your K6 script test.js. We will use thiseDockerfilw to build the Docker image for running K6 script. Open any text editor and create a new file and name it as Dockerfile (without any file extension).
- Define the base image : In the Dockerfile, you need to define the base image for your Docker container. You can use the loadimpact/k6 image, which already has K6 pre-installed. Add the below line to your Dockerfile as first job:
FROM loadimpact/k6 - Copy the K6 script : In the Dockerfile, add a line to copy your K6 script into the Docker container. Use the COPY command to copy the script from the local directory to a directory inside the container. Add the below line to your Dockerfile as second job:
COPY test.js /test.js - Run the K6 script : In the Dockerfile, add a line to specify the command to run the K6 script. Use the CMD command to define the command that we will execute when the Docker container starts. Add the below line to your Dockerfile as third job:
CMD ["run", "/test.js"]
Example Dockerfile that we will use in this blog to run K6 tests
FROM loadimpact/k6

COPY test.js /test.js

CMD ["run", "/test.js"]
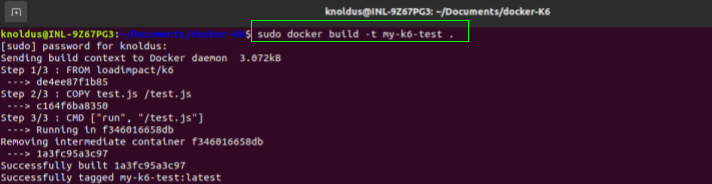
Step 3: Build the Docker Image
Open a terminal and navigate to the directory where your Dockerfile and K6 script are located. Execute below command to build your Docker image :
docker build -t my-k6-test .This command builds the Docker image based on the Dockerfile and tags it as k6-tests. The -t option is used to tag the Docker image with a name (my-k6-test in this example). The . at the end indicates that the Dockerfile is in the current directory.
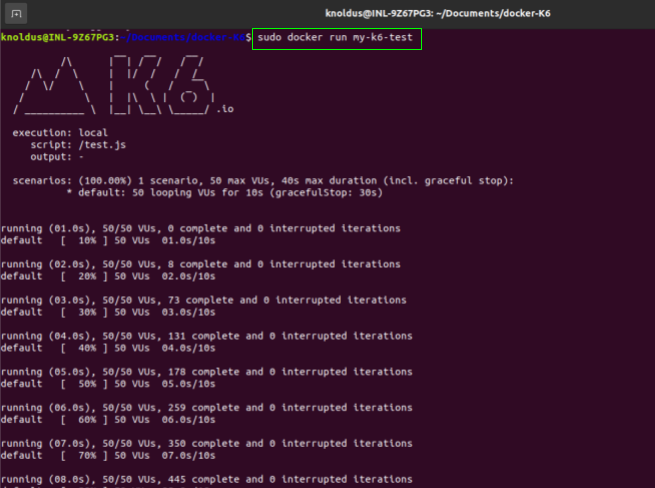
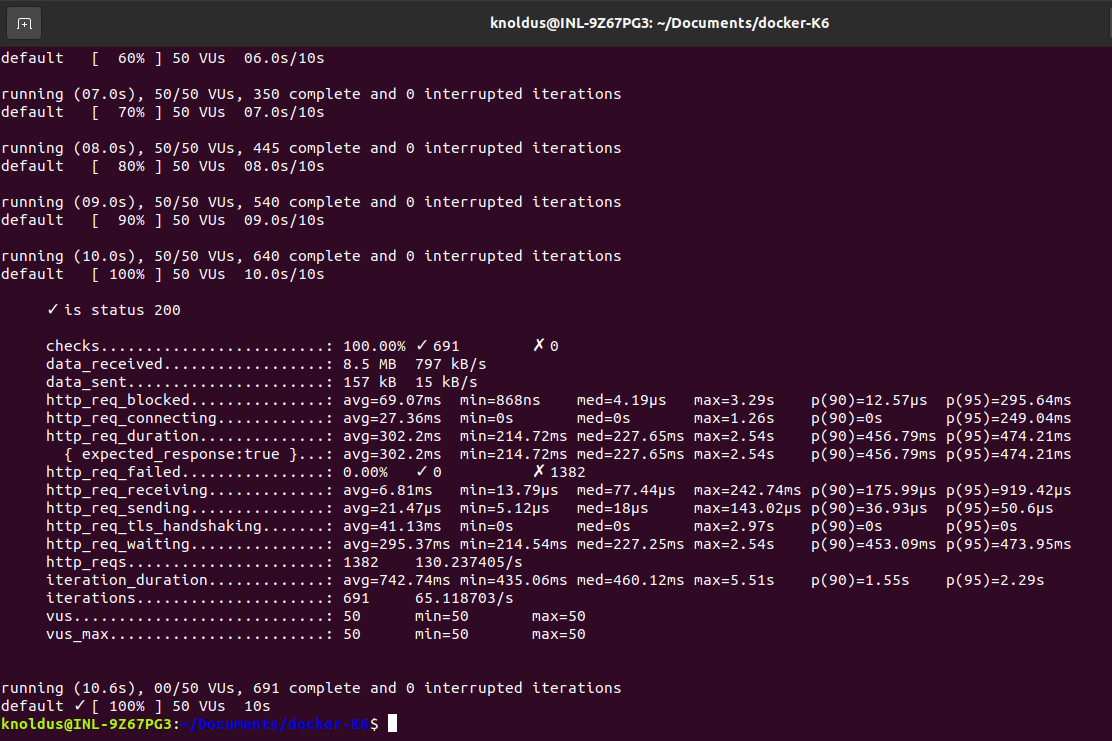
Step 4: Run K6 Tests with Docker
After the Docker image is built, you can run a Docker container based on that image. Execute below command to start a new docker container:
docker run my-k6-testDocker will start a new container based on the image you built, and the K6 script will be executed inside the container.
Step 5: Integrating with GitLab
To integrate the K6 tests with GitLab, we will set up a GitLab CI/CD pipeline that runs the tests on every commit. Create a .gitlab-ci.yml file in the root of your project directory with the following content:
stages:
  - build
  - test

build:
  stage: build
  services:
    - docker:dind
  script:
      - apt-get update
      - apt-get install -y docker.io
      - sudo docker build -t my-k6-test .

test_job:
  stage: test
  script:
    - sudo docker run my-k6-test
This YAML configuration specifies two jobs called building docker image and running test job. It uses the k6-tests Docker image to execute the tests.
Step 6: Trigger the Pipeline
Commit the .gitlab-ci.yml file to your project’s repository to trigger the CI/CD pipeline.
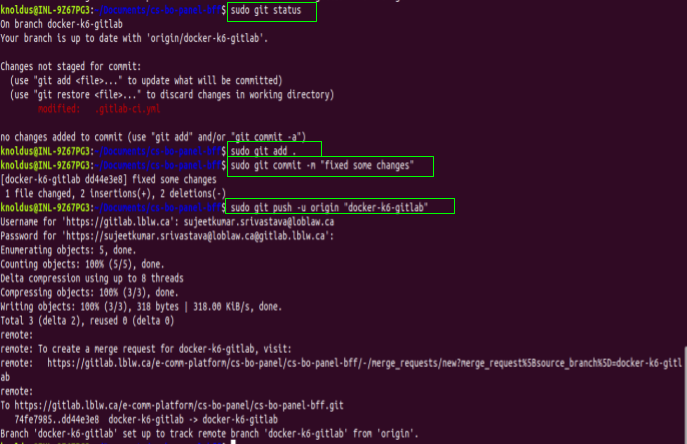
After commit, GitLab will automatically run the K6 tests using the Docker image specified in the pipeline configuration.
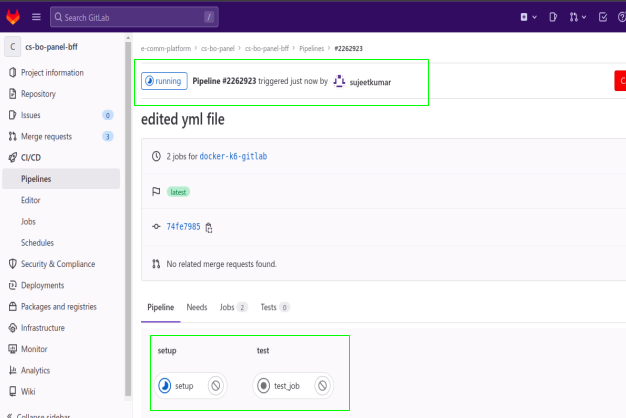
To see your job running, please click on setup or test_job
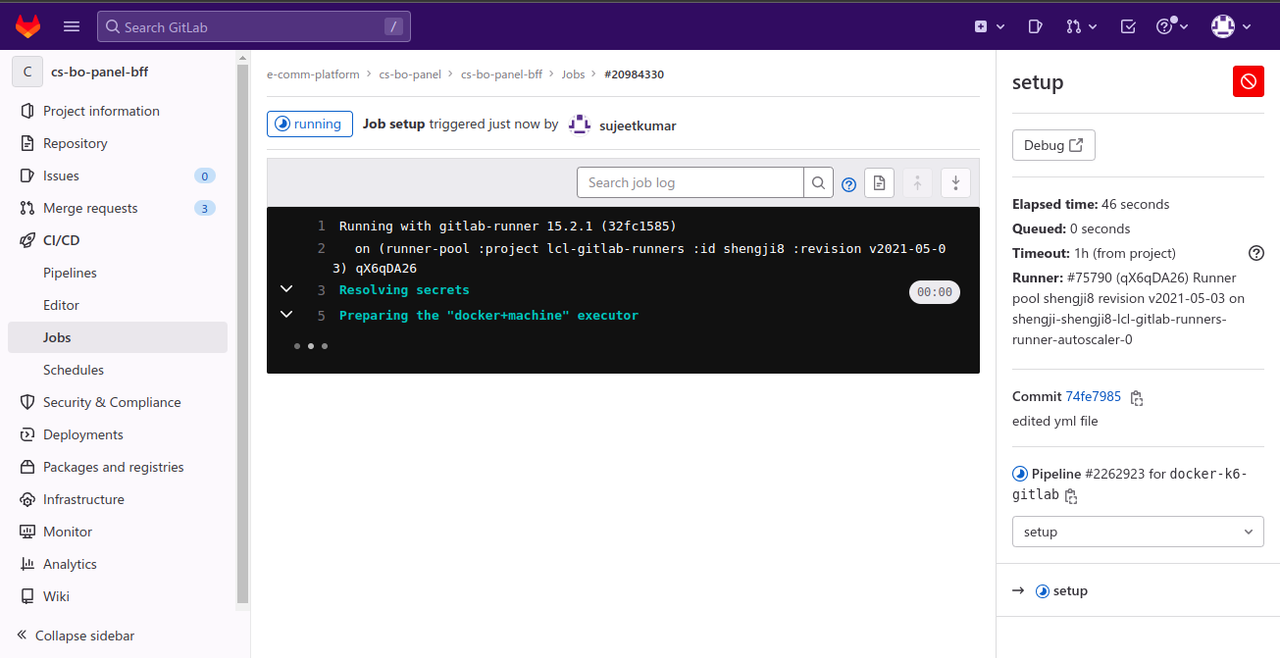
Once your pipeline job will successfully be completed, you will see job succeeded and your K6 tests will be executed.

Conclusion :
In this blog post, we explored how to use Docker to containerize K6 performance tests and integrate them with GitLab for streamlined performance testing. By leveraging Docker’s containerization capabilities and GitLab’s CI/CD pipeline, you can automate the execution of performance tests and ensure scalability and reliability for your web applications. Containerization provides consistency across different environments, making it easier to reproduce and share performance test scenarios. Integrating with GitLab enables seamless collaboration and version control, allowing teams to continuously improve application performance.