


In my last post on NATS, I talked about what it is, benefits of NATS and how it compares with Kafka. We’ll cover the basics of setting up a NATS server, integrating it with a .NET application, and demonstrate how to implement common messaging patterns using the NATS .NET client library. Whether you’re building microservices, event-driven architectures, or simply need a robust messaging solution, this guide will help you harness the power of NATS in your .NET ecosystem. Let’s dive straight into the action!
Prerequisites
- Docker
- Aspire workload
- IDE – Visual Studio
Steps for using NATS in .NET application
1. Create a new solution with empty Aspire template.
2. Install Aspire.Hosting.NATS package either using Visual Studio or following commanddotnet add package Aspire.Hosting.NATS
3. Create a NATS server resource in AppHost’s Program.cs with following:var nats = builder.AddNats("nats");
4. Next, we need to create two worker projects – Producer and Consumer
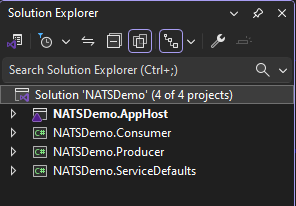
This is how the solution would look like afterwards.
5. Add reference of both consumer and producer projects to AppHost project.
💡You can just drag the project you want to reference and drop on the AppHost project in Visual Studio.
6. Install Aspire.NATS.Net package in producer and consumer projects.dotnet add package Aspire.NATS.Net
7. Inside AppHost’s Program.cs, pass the reference of NATS resource to each project as following: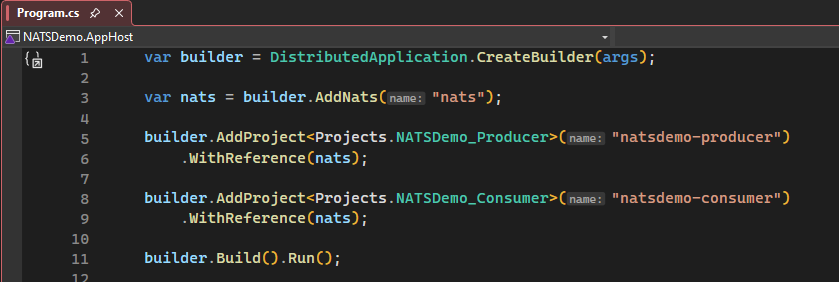
8. In Producer’s Program.cs, we would simply pass the name of the connection as following:
builder.AddNatsClient(“nats”);
9. Go to Worker.cs and add the following code: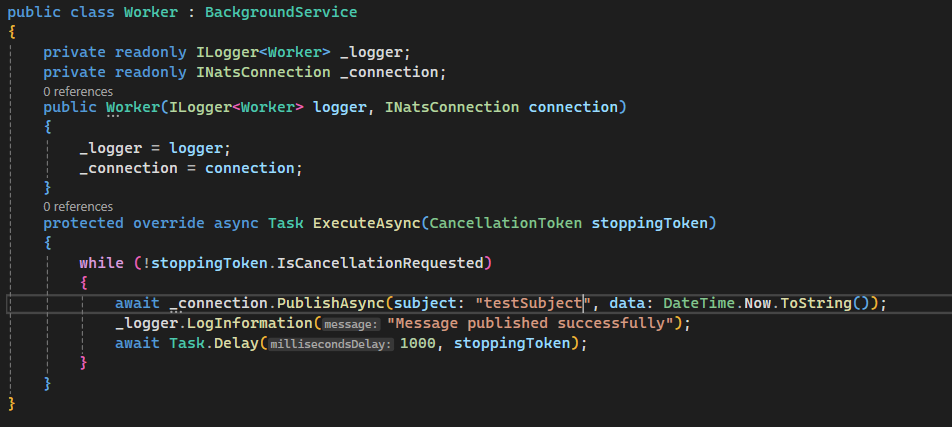
Here, we injected INatsConnection using DI, and then using the PublishAsync method pass the name of the subject and data to it.
10. On the consumer side as well use the AddNatsClient to setup connection. After that use the following code to consume the messages from the above topic we are going to publish to: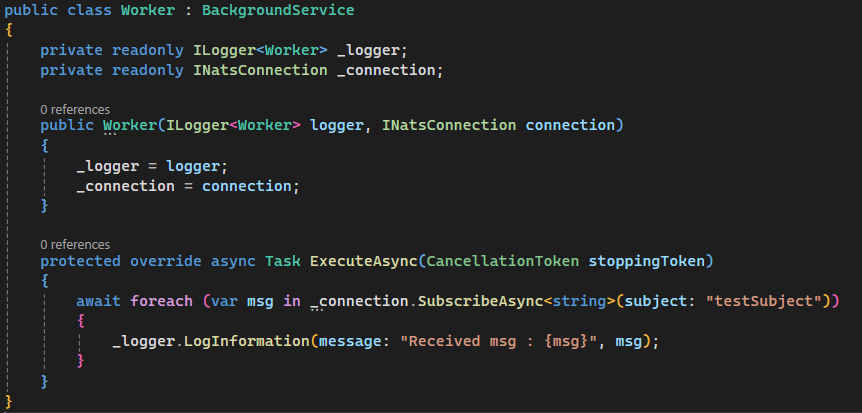
Here, SubscribeAsync method returns IAsyncEnumerable which we can await for each message and log it.
11. Run the AppHost project to see everything in action.
Producer: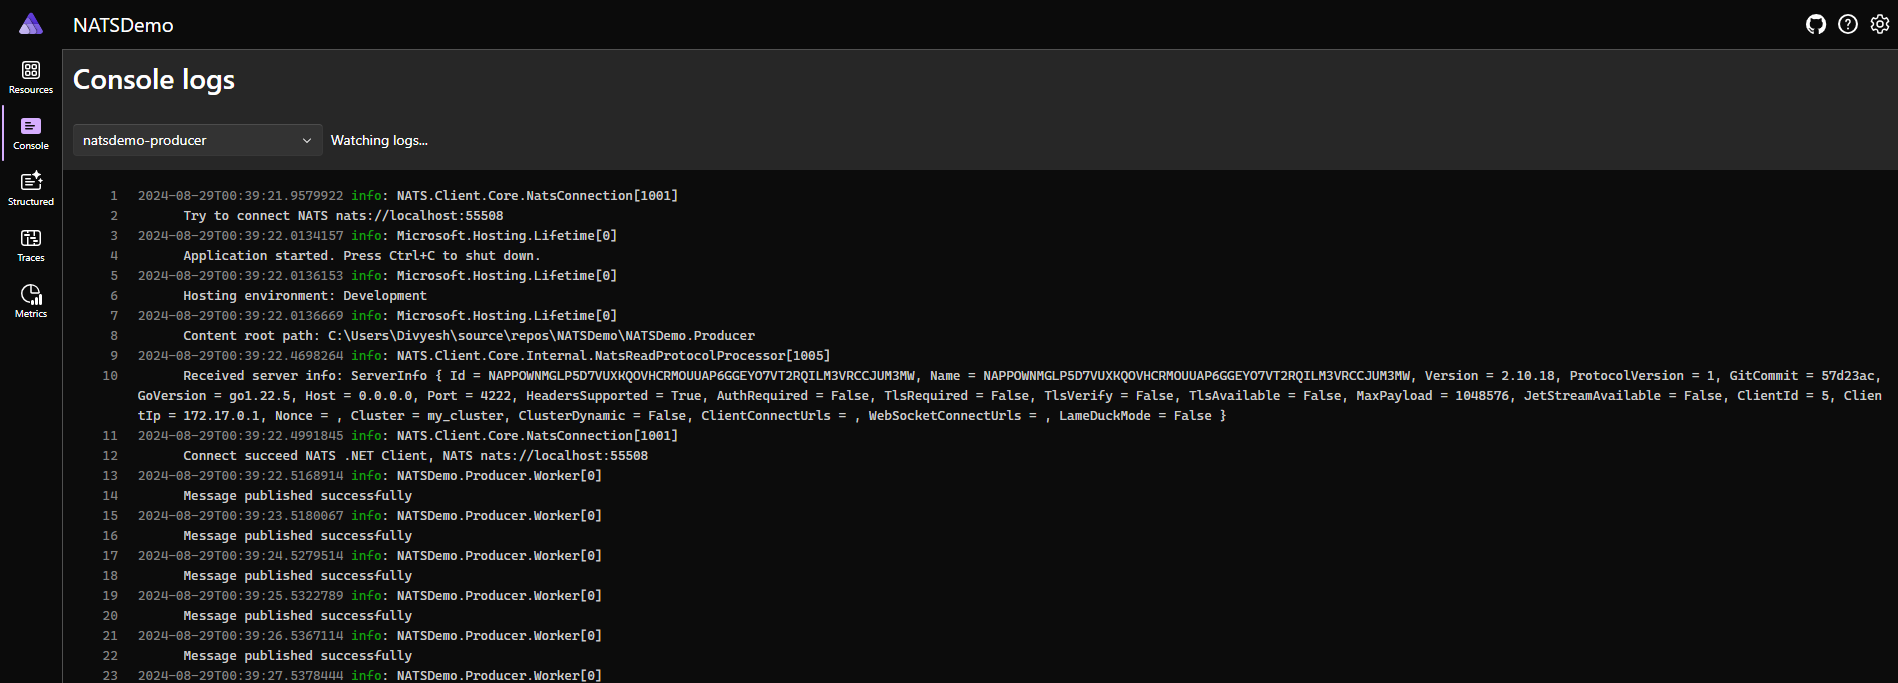
Consumer:
Persistence with NATS JetStream
1. In AppHost, use AddJetstream and AddDataVolume extension methods to add Jetstream support. If you are curious, you can right click on the method and take a look at the underlying implemenation and see what it does.var nats = builder.AddNats("nats")
.WithJetStream()
.WithDataVolume();
2. Next, go to Producer worker and create a new stream with the following code:var js = new NatsJSContext((NatsConnection)_connection);
await js.CreateStreamAsync(new StreamConfig(name: "transactions", subjects: ["transactions.*"]));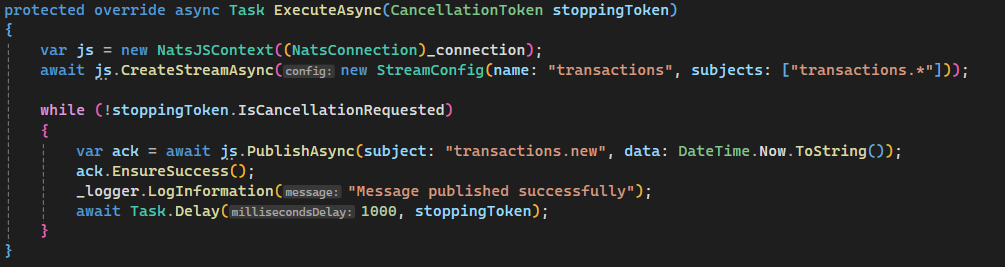
Now, instead of using connection, we will use the NatsJSContext object to publish to the stream we just created.
3. For Consumer, it looks similar too, use the NatsJSContext and consume messages using ConsumeAsync method like following
4. Running the application, again: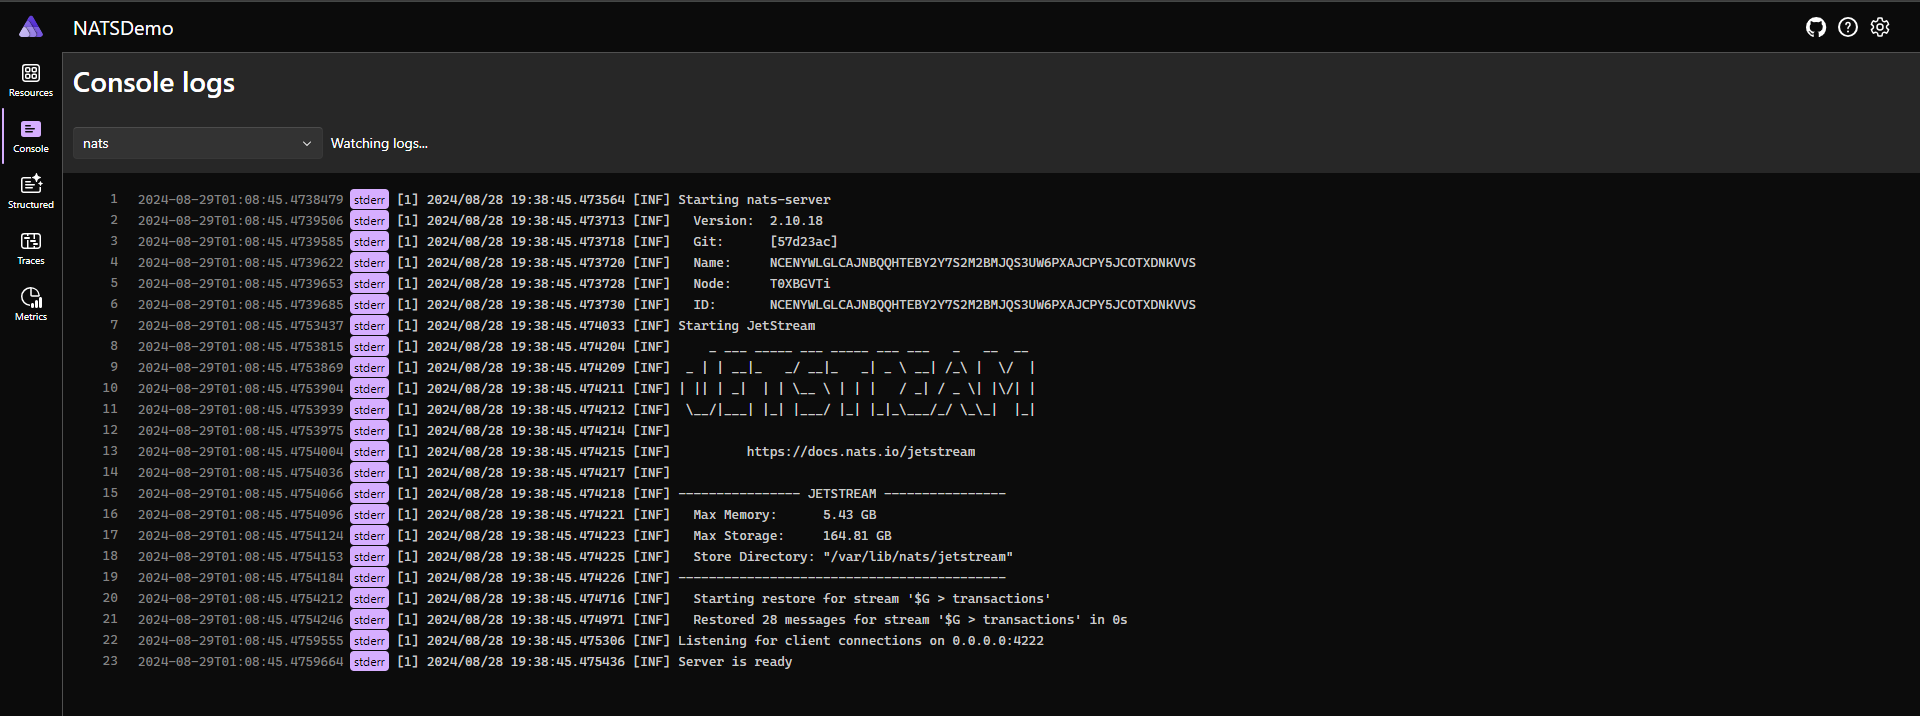
You’ll notice the application runs same as before, but using jetstream even if the consumer goes down for sometime, messages would not be lost. Once the consumer is up again, it would pick up the messages where it left from.
Code Snippets:
AppHost:
Program.cs
var nats = builder.AddNats("nats")
                  .WithJetStream()
                  .WithDataVolume();
builder.AddProject<Projects.NATSDemo_Producer>("natsdemo-producer")
.WithReference(nats);
builder.AddProject<Projects.NATSDemo_Consumer>("natsdemo-consumer")
.WithReference(nats);
builder.Build().Run();Producer & Consumer
Program.cs
var builder = Host.CreateApplicationBuilder(args);
builder.AddServiceDefaults();
builder.Services.AddHostedService<Worker>();
builder.AddNatsClient("nats");
var host = builder.Build();
host.Run();Producer
Worker.cs
public class Worker : BackgroundService
{
private readonly ILogger<Worker> _logger;
private readonly INatsConnection _connection;
public Worker(ILogger<Worker> logger, INatsConnection connection)
{
_logger = logger;
_connection = connection;
}
protected override async Task ExecuteAsync(CancellationToken stoppingToken)
{
var js = new NatsJSContext((NatsConnection)_connection);
await js.CreateStreamAsync(new StreamConfig(name: "transactions", subjects: ["transactions.*"]));
while (!stoppingToken.IsCancellationRequested)
{
//await _connection.PublishAsync(subject: "testSubject", data: DateTime.Now.ToString());
var ack = await js.PublishAsync(subject: "transactions.new", data: DateTime.Now.ToString());
ack.EnsureSuccess();
_logger.LogInformation("Message published successfully");
await Task.Delay(1000, stoppingToken);
}
}
}Consumer
Worker.cs
public class Worker : BackgroundService
{
    private readonly ILogger<Worker> _logger;
    private readonly INatsConnection _connection;

    public Worker(ILogger<Worker> logger, INatsConnection connection)
    {
        _logger = logger;
        _connection = connection;
    }

    protected override async Task ExecuteAsync(CancellationToken stoppingToken)
    {
        var js = new NatsJSContext((NatsConnection)_connection);
        var consumer = await js.CreateOrUpdateConsumerAsync("transactions", new ConsumerConfig("transactions_processor"));

        await foreach (var jsMsg in consumer.ConsumeAsync<string>(cancellationToken: stoppingToken))
        {
            _logger.LogInformation("Received msg : {msg}", jsMsg.Data);
            await jsMsg.AckAsync();
        }


        /*await foreach (var msg in _connection.SubscribeAsync<string>(subject: "test"))
        {
            _logger.LogInformation(message: "Received msg : {msg}", msg);
        }*/
    }
}
Conclusion
Integrating NATS into your .NET applications opens up a world of possibilities for building scalable, resilient, and high-performance distributed systems. We’ve explored the necessary prerequisites, walked through the steps to implement NATS in a .NET environment, and delved into persistence options with NATS JetStream. By leveraging it, you can simplify your messaging architecture while benefiting from its speed and reliability. As you continue to explore NATS, you’ll discover even more features and use cases that can enhance your .NET applications. Happy coding, and may your messages flow swiftly and securely through your NATS-powered .NET applications!