


Introduction
Databricks Compute refers to the computing resources provided by Databricks. This computing infrastructure supports various tasks such as running interactive notebooks, executing automated jobs, and handling SQL commands.
Types of Databricks Compute
There are various types of compute available in Databricks
1. All-purpose compute: It is used to analyze data using the notebook. You can create, terminate, and restart this compute using the UI, and CLI.
2. Job Compute: It is used to run triggered or automated jobs. Refer for more information

3. SQL Warehouse: It is used to run Databricks SQL commands. You can create SQL warehouses using the UI, and CLI.
4. Instance pools: This Compute is idle, ready-to-use instances, used to reduce start and autoscaling times. You can create this compute using the UI, and CLI.
Advantages of Databricks Compute
1. To run the interactive databricks notebook
2. It provides job compute that helps in cost optimization.
3. Helps to run the SQL Commands through SQL Warehouse (Endpoint).
How to Setup Your First Databricks Compute
Here we are going to discuss, how to configure your first all-purpose compute through Databricks UI.
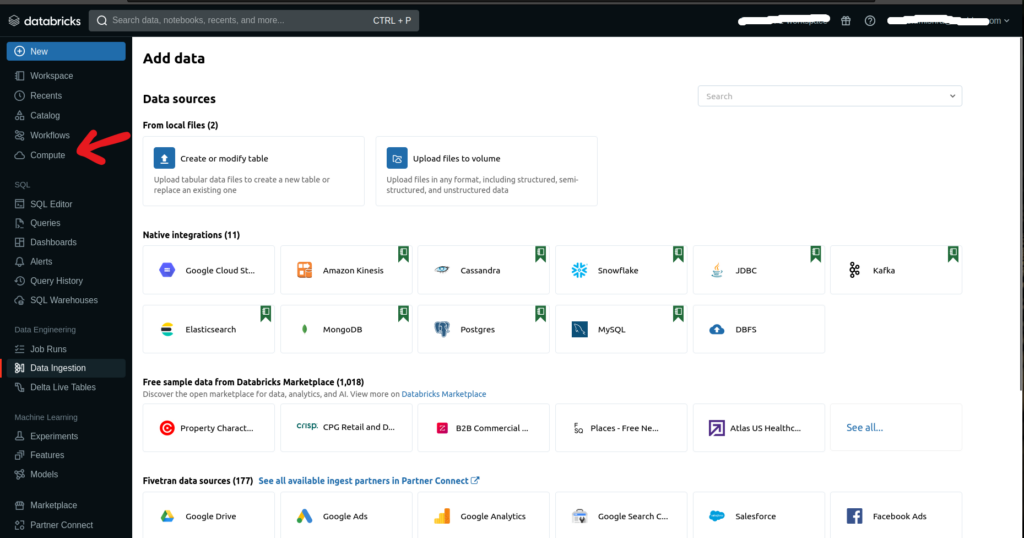
1. Login to Databricks account. On the Databricks UI Dashboard, choose Compute or select Compute from the drop-down menu by clicking on New.
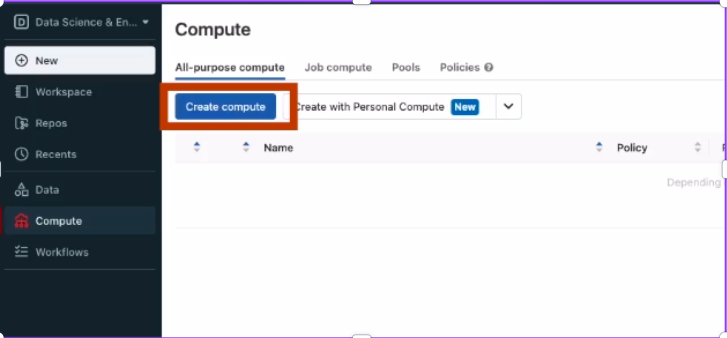
2. Now navigate to All-purpose compute and click on Create compute
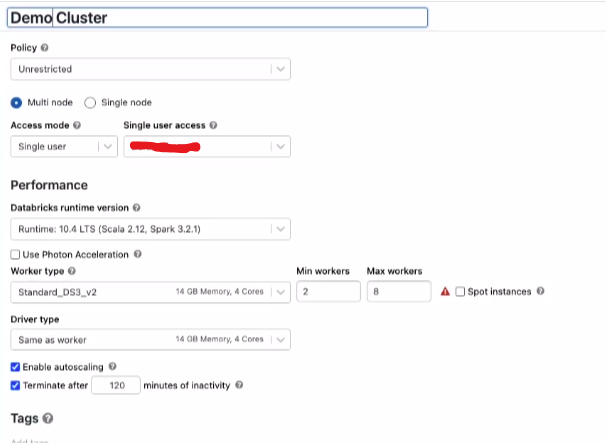
3. Configure compute details including policy, node type, Databricks runtime version, and other specifications.
4. Policy is the set of rules that are designed by the admin to restrict the permission to create the cluster. You can select the policy.


5. Select the type of node. There are two types of nodes available multi-node and single node. There is a difference in the worker node type and driver node type for both compute configurations.
Select multi-node for a workload to support multiple worker nodes and process tasks quickly. Alternatively, use single-node for simpler tasks.
Select any of them.
6. Now you can select the access mode and single-user access.

| Access Mode | Visible to user | Support Languages | Notes |
| Single User | Always | Python, SQL, Scala, R | used by only a single user. |
| Shared | Always(Need Premium Plan) | Python, SQL | used by multiple users |
| No isolation Shared | Admin can hide the cluster type from the admin setting page. | Python, SQL, Scala, R | account-level setting for this type of cluster |
| Custom | Hidden(for all new clusters) | Python, SQL, Scala, R | This option is shown only if you have existing clusters without a specified access mode. |
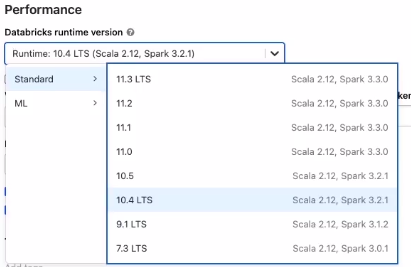
7. Now select the Databricks runtime version. Choose the latest version for all-purpose compute, as it supports the newest optimizations and up-to-date packages.
8. Photon is an engine on Databricks Lakehous Platform that helps fast query performance at a low cost. Refer it for more information.
As per your need, you can enable it or leave it.

Different Configuration for Multi-Node & Single-Node Compute
9. Multi-node and single-node configurations feature distinct in worker types and driver types, which are elaborated below.
For Multi-Node you have two options worker type and driver type.
Here you can select the worker type as per your workload and assign the number of worker types example 2 to 5, etc..
In the driver type select the type of driver. Driver type maintains state information of all the notebooks attached to the cluster.

Enable autoscaling is used to specify the minimum and maximum worker nodes. If autoscaling is unchecked, a fixed number of worker nodes is established.

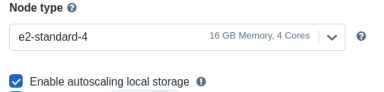
In Single-Node, the driver node functions as the sole worker node, handling all tasks. To select the node type, click on the node type and choose the desired type from the drop-down menu.

Enable autoscaling local storage involves Databricks continuously monitoring the free disk space on the Spark workers within your cluster.

10. Termination after is utilized to specify the duration for cluster termination when it remains idle for a specific period.
To reduce the cost we have to define the termination duration.
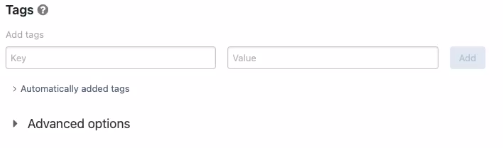
11. Define tags and, in the advanced options, specify Spark configurations and numerous other settings available in the advanced configuration section.
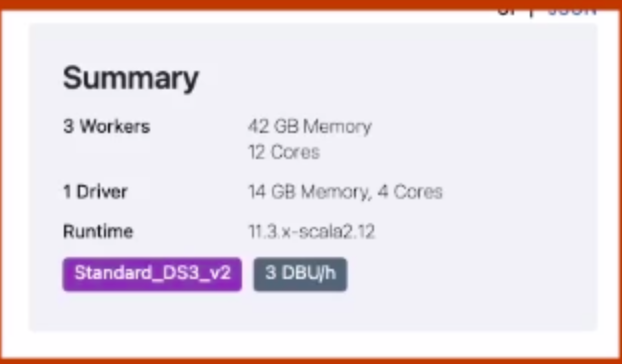
12. In the top right you can see the cluster size and DBU(cost) per hour of the cluster
13. Now click on Create Compute. After a startup of the cluster, you can attach it to the notebook or job to execute ETL operations.

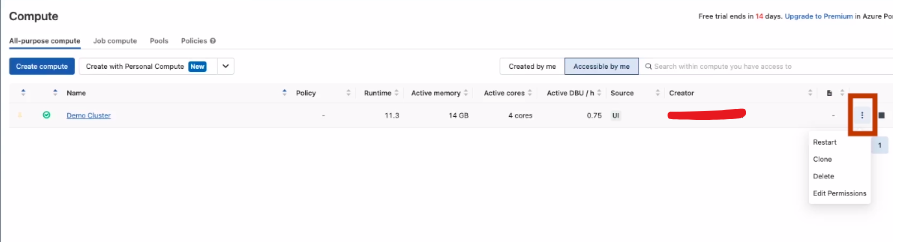
Compute Dashboard
Here, you can manage the cluster by stopping or restarting the compute, editing permissions, checking event logs, adding libraries, reviewing driver logs, and more.
Conclusion
In conclusion, Databricks Compute offers an infrastructure supporting various tasks, including interactive notebooks, automated jobs, and SQL commands. With options like all-purpose compute, job compute, SQL warehouses, and instance pools. Setting up the first all-purpose compute through the Databricks UI involves configuring policies, node types, runtime versions, and other specifications, providing flexibility and scalability for diverse workloads. The Compute Dashboard facilitates easy management, making Databricks a powerful platform for data analysis and processing.
Related Article
Databricks Job Workflow

Delta Time Travel

Delta Sharing