


In the realm of application security, ensuring that only authorized users gain access is a top priority. Azure Active Directory (Azure AD), Microsoft’s cloud-based identity and access management service, offers a robust solution for authentication and authorization. Integrating Azure AD with your Spring Boot application enhances security and simplifies user access management. In this comprehensive guide, we’ll walk through the entire process, from setting up Azure AD to configuring your Spring Boot app and managing users with roles.
Prerequisites
Before embarking on this journey, make sure you have the following prerequisites:
- A Spring Boot application (a basic one will suffice for this guide).
- An Azure account.
- A fundamental understanding of Spring Boot and Azure AD.
If you’ve got all the prerequisites ready, let’s embark on securing your Spring Boot application with Azure Active Directory.
1. Create an Azure AD Tenant
- Sign in to the Azure portal.
- Head to the “Azure Active Directory” section on the left-hand menu.
- Click “Create a tenant” and follow the on-screen instructions to create a new Azure AD tenant, if you don’t already have one.

once you select azure active directory and click on Create button you will got the Tenant-Id
2. Register Your Application in Azure AD
- In the Azure portal, navigate to “Azure Active Directory” and select “App registrations.”
- Click “New registration” to create a new application registration.
- Provide a name for your application and specify the supported account types, which may include “Accounts in this organisational directory only” or others based on your requirements.
- Set the Redirect URI. This is where Azure AD will send authentication responses. For local development, you can use
http://localhost:9191/login/oauth2/code/azure.

- Click “Register” to create the application.

- Make note of the “Application (client) ID” and “Directory (tenant) ID” as you’ll need them later.
3. Configure Your Spring Boot Application
- Open your Spring Boot application project.
- Add the necessary dependencies for Spring Security and Spring Security OAuth2 to your
pom.xmlorbuild.gradlefile.
                 <dependency>
			<groupId>org.springframework.boot</groupId>
			<artifactId>spring-boot-starter-oauth2-client</artifactId>
		</dependency>
                <dependency>
			<groupId>com.azure.spring</groupId>
			<artifactId>spring-cloud-azure-starter-active-directory</artifactId>
</dependency>- In your
application.propertiesorapplication.ymlfile, configure the integration with Azure AD by providing the client ID, client secret, tenant ID, and OAuth2 URLs. Be sure to replaceYOUR_CLIENT_IDandYOUR_TENANT_IDwith the actual values from your Azure AD application registration.
spring:
  cloud:
    azure:
      active-directory:
        enabled: true
        profile:
          tenant-id: <YOUR TENANT ID>
        credential:
          client-id: <YOUR CLIENT ID>
          client-secret: <YOUR CLIENT SECRET>
4. Secure Your Spring Boot Application
Create a Java class that extends WebSecurityConfigurerAdapter and override the configure(HttpSecurity http) method to define security configurations for your Spring Boot application. In this example, we secure all routes except those under “/public.”
@Configuration
public class SecurityConfig extends WebSecurityConfigurerAdapter {

    @Override
    protected void configure(HttpSecurity http) throws Exception {
        http
            .authorizeRequests(authorizeRequests ->
                authorizeRequests
                    .antMatchers("/public/**").permitAll()
                    .anyRequest().authenticated()
            )
            .oauth2Login(withDefaults());
    }
}
5. Create Users and Provide Roles in Azure AD
- In the Azure portal, navigate to “Azure Active Directory.”
- Under “Users,” create new users and assign roles, such as “User” or “Admin.”
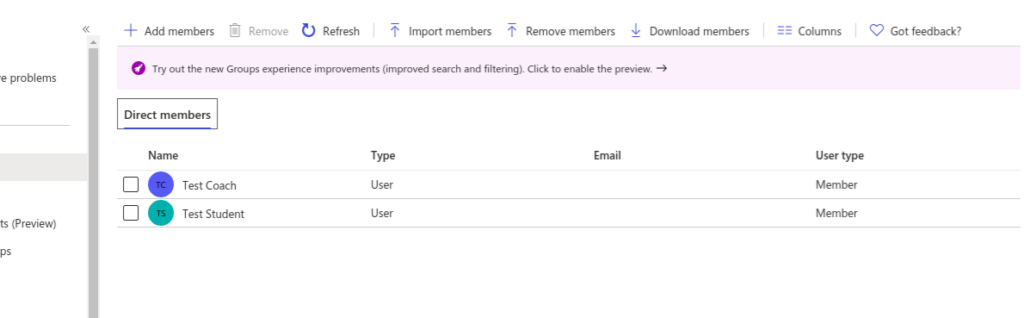

- These users and roles will be crucial for controlling access and permissions within your Spring Boot application.
Now let’s finally test the APIs to know if everything is correct.
Accessing http://localhost:9191/api/login and http://localhost:9191/api/students will take you to the Azure AD login page and after successful authentication, you should be able to call the above APIs.
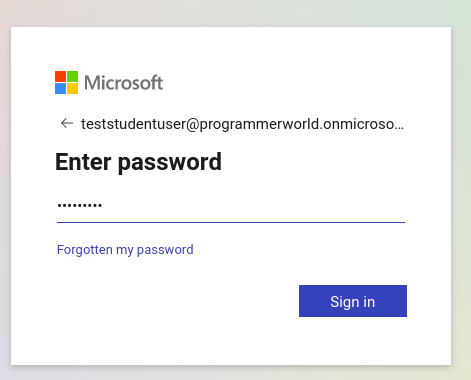
Once you enter the credentials you will able to get the response..
Conclusion
By following these comprehensive steps, you’ve successfully secured your Spring Boot application with Azure Active Directory. This integration not only offers robust authentication and authorisation capabilities but also simplifies user access management. Creating users and assigning roles in Azure AD adds an additional layer of access control, making your application secure and enterprise-ready. With this setup, you can confidently protect your application and its data from unauthorised access and ensure that it meets the highest security standards.
References
Azure Application Insights Documentation
For further insights, please visit this blog.