


Introduction
Up until now, we’ve seen how to create an application, publish it as a CLI tool, and execute it with Azure Pipeline to list all Nuget packages being used, as promised in the previous article, we will continue to finish the tool to list all NPM packages, let’s dive right in.
If you haven’t followed along from the begining, please check out the list of previous article below:
Creating .Net Project Template
We can achieve our goal as promised in the previous post by creating another Console application, copying the source code from the 1st post and similar instructions from the 2nd post, but think about the future: if we need to create more tools like that, why don’t we create our own template and reuse it later, that’s exactly what we’re going to do now.
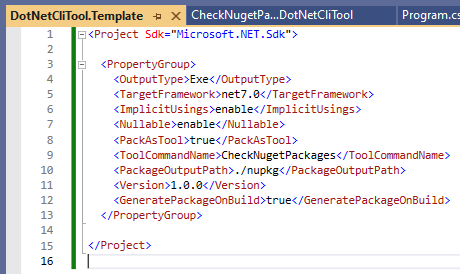
Following the 2nd post, let’s create another Console application named DotNetCliTool.Template, and copy the content of CheckNugetPackages.DotNetCliTool.csproj to the DotNetCliTool.Template.csproj file.
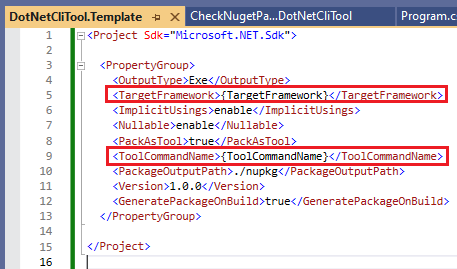
On the line 5, change net7.0 to {TargetFramework}
On the line 9, change CheckNugetPackages to {ToolCommandName}
Now the DotNetCliTool.Template.csproj file should look like this
Back to the root of the project, create .template.config/template.json file and populate its content as below:
{
"$schema": "http://json.schemastore.org/template",
"author": "Phong Nguyen",
"classifications": [ "Common", "Console" ],
"identity": "PhongNguyen.DotNetCliTool.Template",
"name": "PhongNguyen DotNetCliTool Template",
"shortName": "PhongNguyenDotNetCliToolTemplate",
"sourceName": "DotNetCliTool.Template",
"tags": {
"language": "C#",
"type": "project"
},
"symbols": {
"TargetFramework": {
"type": "parameter",
"description": "Target Framework",
"datatype": "choice",
"choices": [
{
"choice": "net6.0"
},
{
"choice": "net7.0"
}
],
"defaultValue": "net7.0",
"replaces": "{TargetFramework}"
},
"ToolCommandName": {
"type": "parameter",
"description": "Tool Command Name",
"datatype": "text",
"defaultValue": "",
"replaces": "{ToolCommandName}"
}
}
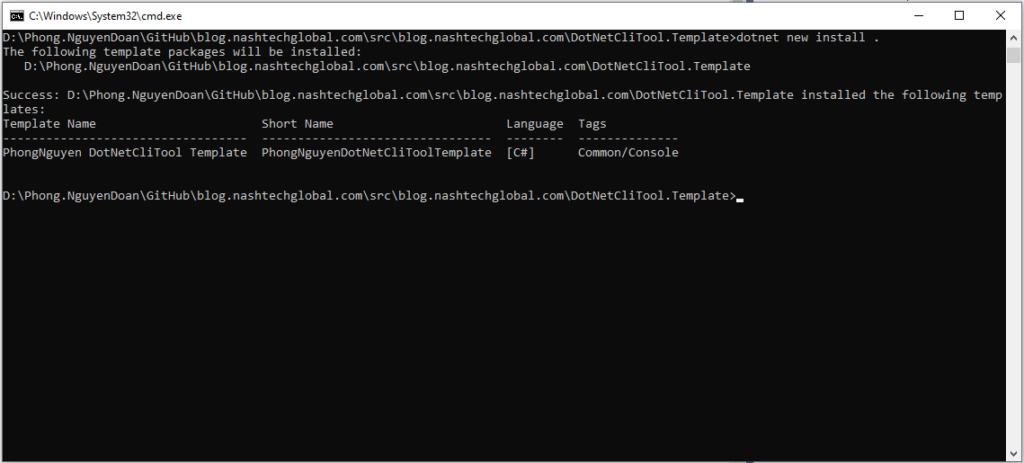
}Open cmd and type dotnet new install . command.
Now that the template has already been installed, let’s start using it to create our CheckNpmPackages CLI tool.
Using The Template
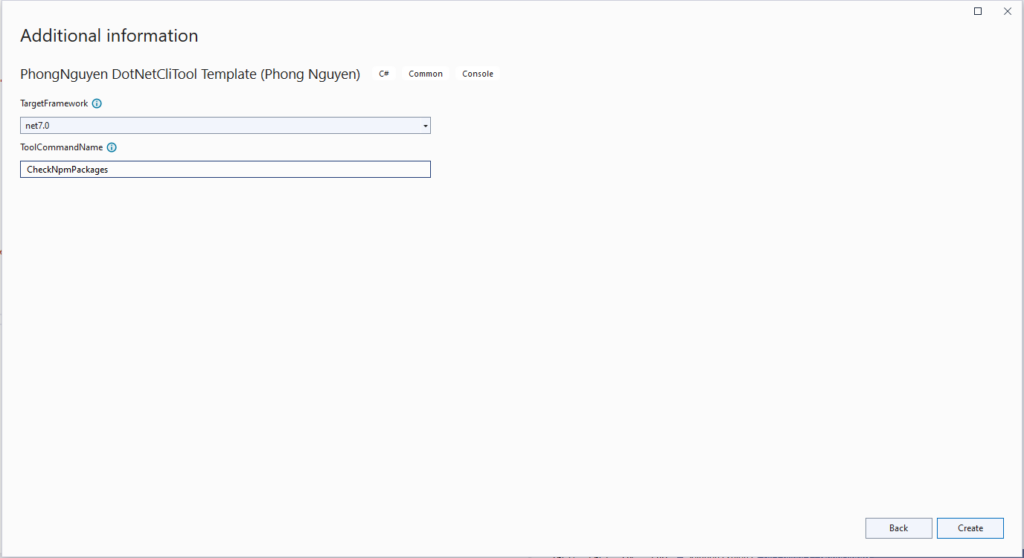
Let’s create another project using our newly created template, if you’re using Visual Studio 2022, you should see a similar picture as below when selecting a template.

Click Next, and name our project as CheckNpmPackages.DotNetCliTool and click Next to continue.
In the TargetFramework dropdown, select net7.0
In the ToolCommandName textbox, type CheckNpmPackages and click Create.
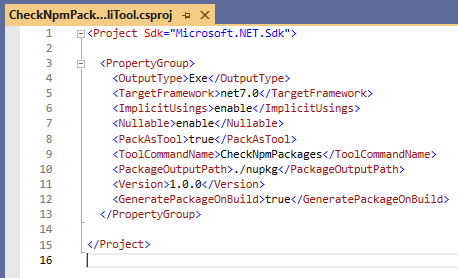
After the project was created successfully, open the CheckNpmPackages.DotNetCliTool.csproj file and we should see the common instructions have been populated as below:
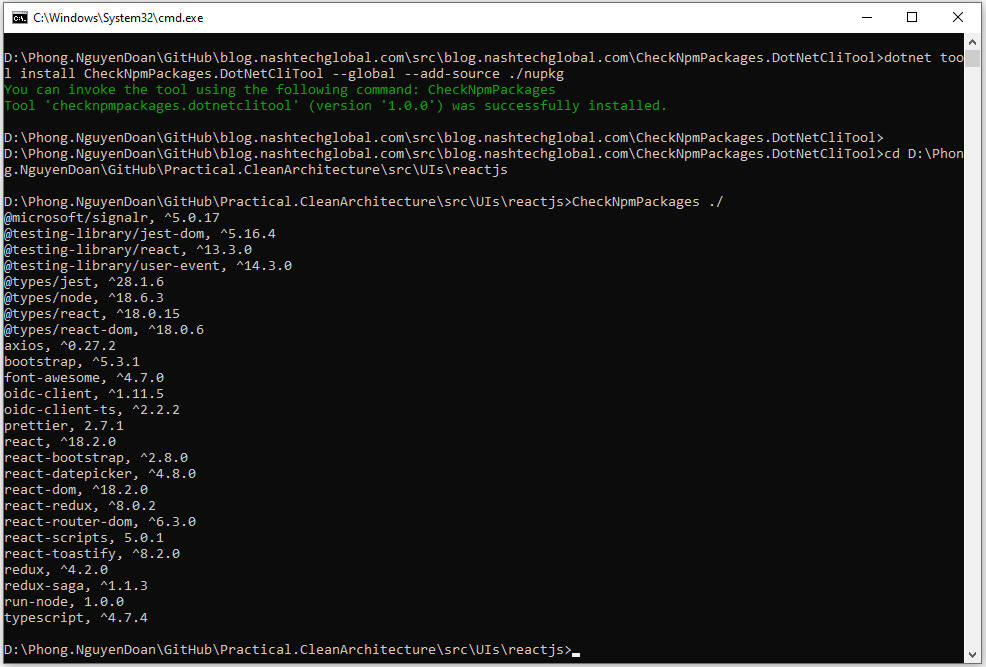
Now, follow the same instructions from the 1st and the 2nd posts of the series, then we can easily complete and test our CheckNpmPackages CLI tool.
Summary
That comes to the end of the series, so far we have seen how we’ve eliminated manual and repeated works by embracing automation and reusability.
As always, the full source code for this demo is published at https://github.com/phongnguyend/blog.nashtechglobal.com please check that out.